Monday, March 24, 2008

Not Cross Buns: Cinnamon Scrolls

This would probably have been a better recipe to share before Easter, since now you can’t possibly make these for breakfast on Easter morning, as we did. However, since it’s an awfully nice recipe, I would say you shouldn’t wait for next Easter to make it. Tomorrow would be fine.

Every year for about fifteen years now, I’ve intended to make hot cross buns for us to have on Easter morning. Having grown up on English children’s books, it just seemed the Mary Poppins-Beatrix Potter-Alice in Wonderland thing to do. Somehow, though, even before we had kids, I could never manage to get my act together. I’m not sure what it was that I found so daunting, or dissuading. Buying currants (they’re kind of traditional)? Setting the dough to rise? Waiting for the rise time? I can’t recall now, but suffice to say I still haven’t made hot cross buns.

This year, however, I made something that I’m not sure isn’t even better. Cinnamon Scrolls drew my attention as I was flipping through old Donna Hay magazines. They were the cover shot for issue #8, and they were so impressive looking, with their whirl of filling and their grand stature. I had to try them.

The dough is a simple yeast dough that the instructions say to make in a food processor, then transfer to a lightly oiled bowl for rising. I made one batch of dough and waited the hour and a half as instructed. When I returned to check on the dough, it hadn’t risen a single bit as far as I could tell. Not even a smidge. I thought back over the process of making the dough; had the milk not been warm enough? Or had the food processor rendered the yeast ineffective somehow? Can food processors mangle yeast so badly that they won’t work their little gaseous magic on dough? Was I a heartless killer of single-celled organisms??

With a sigh I consigned batch number 1 to the trash and started over. This time I made sure the milk was nice and warm (I even used the thermometer to measure it), and mixed the whole thing up in the stand mixer, just to avoid a possible murder rap. Once again I put the dough to rise and went about my business for an hour and a half or so. Once again, the dough looked exactly the same at the end of that time as it had at the beginning.

This time I shrugged and moved forward. If they flop, I told myself, they flop, and I’ll just deal with that disappointment when it happens. The recipe called for ground hazelnuts, but since I had almond meal on hand, I swapped that out. I think I’ve seen hazelnut meal in the stores, and if you want to use that, it’s what the recipe actually calls for, but I can highly recommend the almond flavor as well.

Well, they turned out to be wonderful. They rose nicely in the heat of the oven, as you can see, and actually looked as impressive in real life as they did in the magazine. This is what I love about Donna Hay—her food really does look as beautiful when you make it yourself as it does when her professional stylists get ahold of it. With Donna Hay’s books and magazines, even a rank amateur such as myself can produce something that looks like it belongs in…well, in the pages of a magazine or cookbook.

These little scrolls made an excellent Easter breakfast, and while I may one day make hot cross buns as I’ve so long intended to, for now I’m satisfied with these. The dough is firm enough to hold the filling, yet still flaky and tender. The filling itself is subtle, not too sweet, with a hint of cinnamon and almond. Their unusual shape makes them real attention grabbers, and they’re a snap to make. Even if the dough doesn’t rise, I urge you to forage ahead and make them anyway. You won’t be sorry.


Cinnamon Scrolls
from Donna Hay magazine, issue #8
makes 8 scrolls; how many that will serve depends on how hungry and/or how willing you are to share


3 cups all-purpose flour
¼ cup sugar
¾ teaspoon salt
1 ½ teaspoons active dry yeast
1/3 cup lukewarm milk
2 tablespoons lukewarm water
2 eggs
4 oz butter, softened

Filling
3 ½ oz butter, softened
½ cup brown sugar
3 teaspoons ground cinnamon
¾ cup almond meal

Preheat oven to 330 degrees F. Place flour, sugar, salt, yeast, milk, water, and eggs in a food processor and process until the mixture forms a dough. With the motor running, add the butter, a little at a time, until combined. Place the dough in a lightly oiled bowl, cover with a clean tea towel and set aside in a warm place for 1 ½ hours or until the dough has doubled in size (N.B. don’t get discouraged if it doesn’t rise; mine never did, not either batch).

To make the filling, place the butter, sugar, cinnamon, and almond meal in a bowl and mix to combine. Set aside.

Roll out the dough on a lightly floured surface to an 18” x 10” rectangle approximately ¼” thick, with the long side facing you. Spread evenly with the filling, leaving a 1” border at the top. Roll up the dough, starting with the side closest to you, shaping it into an even roll.

Cut into 8 pieces and place in paper baking cups (available at baking supply stores) or a baking tray, or in paper cupcake liners in a muffin tin. Bake 25 minutes or until lightly golden. As always seems to be the case with Donna Hay recipes, mine took closer to 35 or 40 minutes to get golden, but start checking at 25 minutes.

Friday, March 21, 2008

Versatility and Ease: Tomato Bread Soup

Sometimes soup is just what I want, but I don’t want to go to a lot of trouble, nor do I want to eat the kind that comes out of (and tastes just like) a can. Lack of time, however, often sends me in another direction because making soup the way I want it made is labor intensive and I often just can’t manage it.

Enter Tomato Bread Soup. Although this uses some convenience ingredients (canned tomatoes and, in my case, some ready-made chicken broth), it has a homemade taste that belies its ease of preparation. It consists primarily of tomatoes, bread, and some broth to thin it down. It doesn’t get much easier than that.

This is a pretty versatile recipe, which could be made with vegetable broth (as the original recipe instructs) and served to vegetarians, or made with chicken broth as I did, and served to omnivores. I’d love to try it on a rainy summer evening, when I have fresh tomatoes, fresh basil, homemade chicken stock (although I used some homemade chicken broth in making it, I was forced to add some of the prepared kind as well), and leftover homemade bread. Even with the prepared ingredients, it was still an easy, comforting dinner.

The only complaint I heard was that it’s hard to justify dipping bread into something that already has bread in it. To which I say, get over it. Bread is the staff of life. I think this soup with a Caesar salad would be a fantastic soup and salad meal. Call it an American dinner with an Italian accent.

In the magazine article from which I got this recipe, they recommended drizzling really good olive oil over the top of it, and garnishing it with torn fresh basil. I happened to have half a jar of homemade pesto sauce left over from a pesto mayonnaise that was used on grilled proscuitto, provolone and arugula sandwiches the week before, so I swirled that in. Chopped black olives would be a nice garnish, as would a scattering of toasted pine nuts, or even some toasted buttered breadcrumbs, which could be made with the crust of the bread that goes into the soup.

The thing I think I love the very best about this recipe is that it’s so season-friendly. Really, you could make it any time of the year. In the winter you could make it with canned tomatoes and the chopped olive or pine nut garnish. In the spring it would be a peek at summer, using the first tender leaves you could harvest from the basil plants. In the summer on one of those occasionally cool rainy evenings, using immediate ingredients, it would sing and provide refreshment, comfort and warmth. In the fall when we sway between looking forward to cooler days and autumn cooking, and sadness over the loss of summer’s warmth and plenty, this soup could provide a compromise—use the last of the summer tomatoes, the last of the basil plucked before it gets nipped by frost, but make a warm, filling soup.


Tomato Bread Soup
from Delicious magazine, April 2008
serves 4-6 people who want something warm, bright, and versatile


2 tablespoons olive oil
2 small onions, chopped
2 cloves of garlic, chopped (more to taste)
2 14oz cans of diced tomatoes
2 cups vegetable or chicken broth
1 loaf Italian bread, crusts removed, insides torn up
Salt and pepper, to taste
Garnish of choice

Sautee onion and garlic in olive oil over medium heat for 8-10 minutes, until soft, but not browning. Add tomatoes, and let cook 8-10 minutes more until tomatoes start to break down. Add broth, bring to a boil, then reduce to a simmer and cook for 10 to 15 minutes until reduced slightly. Add bread and cook 20-25 minutes until thick. Season with salt and pepper. The consistency should be something like porridge. Add more broth if necessary.

I also found that my bread wasn’t quite stale enough, so I broke out the stick blender. A food processor or a traditional blender could also be called into service, but don’t overdo the blending—the idea is to have a thick, rustic feel to the soup.

Garnish as desired. The original recipe calls for another tablespoon or so of really good olive oil, plus half a dozen leaves of basil torn up, per bowl.

Thursday, March 20, 2008

Inspiration: Zucchini Fritters

Spring is taunting us. It’s sunny, then it clouds over and spits rain. The air is warm, then a quick breeze whips out of nowhere and chills you. To improve matters, I’ve been having a kind of rough time at work lately, which led to my working from home last Friday. After a few hours, I felt the need to cook something, to cheer me up. Problem was, nothing looked appealing. I felt like I’d been kind of heavy on the baked goods lately, so I nixed anything like that. What I really needed was something for lunch, but everything either took an hour, or used ingredients like bar-b-qued duck that I didn’t have on hand.

Then, as is often the case, I saw something that looked like it might be right, and then I saw it again. Fate, I decided, had led me to the zucchini fritters. I came across them first in The Barefoot Contessa At Home by Ina Garten. Then they were part of a menu in Donna Hay magazine called Friends for Lunch: Grazing. The Barefoot Contessa called for shredded zucchini, while Donna Hay called for ribbons, and served them with a “lemon aioli.” A fried vegetable that gets served with garlic mayonnaise? Where do I sign?

Both recipes were for simple flour and egg batters with zucchini in them. I used a vegetable peeler to strip the zucchini into wide ribbons edged in dark green, but have since decided that cutting the zucchini into rounds with the peeler is the way to go. Frankly, I’m pretty lazy, and grating is way too much work, while ribbons makes them hard to cook. Cutting the zucchini into rounds makes them slip into an approximately disklike shape fairly easily. The ribbons required a certain amount of rearranging to get the fritter into a pleasing and fritter-like configuration.

Ina Garten called for some grated red onion, Donna Hay for some chopped mint. In a compromise, I used chopped chives. I felt the zucchini would need something peppy, like onion, but not as harsh as onion. Zucchini is kind of like your sweet, quiet friend who never has much to say until you get her on the right subject, and then she just sparkles. The fritters needed something to make them sparkle, but not something that would take over flavorwise.

The batter ends up being slightly soupy. It’s fried in either oil or a combination of oil and butter. I chose oil and butter for the flavor butter would give them the first time around, but the downside to that combination is that of course the butter darkens. A thin film of olive oil, or even a spray of cooking spray, works just as well.

Two spoons are helpful for picking up heaps of rounds or ribbons and slipping them gently into the pan to cook. During my first attempt, after a few minutes I flipped the first fritter over with a spatula, and was amazed. It was golden, crisp and lacy. After a few more minutes, I slipped it out onto a plate and cooked the rest of them. A word of warning—they really do require eight or so minutes of cooking time, even though they look done after only two or three per side. Heat regulation is the key. It’s a balancing act between keeping the flame high enough to keep the oil hot enough to cook the fritters, but low enough not to burn them.

I’ve read of serving zucchini fritters with ketchup, but the lemon aioli was too tempting. It turned out that the garlic in the aioli was just a little overpowering. Zucchini is such a delicate flavored vegetable that raw garlic is just too much for it. Lemon mayonnaise would be fine, with a little chopped garlic in the batter for that garlicy flavor.

I tried reheating these fritters for lunch a second day and as you might imagine, they’re pretty sog when you do (not helped by the fact that I did it in a microwave). I also tried holding them in a 200 degree oven for a little while. This can be done with greater success than reheating. It should probably be your absolute last choice, with your first choice being, eat them as soon as they’re cool enough to handle, but it’s a better choice than eating them cold.


Zucchini Fritters
adapted from Donna Hay magazine #35, and The Barefoot Contessa At Home
makes approximately 8 fritters

2 medium zucchini (about 5 ounces), cut into rounds with a vegetable peeler
½ cup self-rising flour
3 large eggs
¼ cup chopped fresh chives
Salt & pepper to taste

Combine zucchini, flour, eggs, chives, salt, and pepper in a medium bowl. Stir to combine.

In a medium skillet, heat a tablespoon (or so) of olive oil until a drop of water sizzles in it. Add about ¼ cup of the zucchini mixture and allow to cook until set, about 3 minutes. Turn the heat down and continue cooking about 5 more minutes. Flip fritter over and cook until underside is brown.

Fritters can be held in a 200 degree oven for ten or so minutes.

Lemon Aioli
from Donna Hay magazine, issue #35
Although I personally found this too strong, others may like it.

½ cup mayonnaise
1 clove garlic, crushed
Juice of ½ - 1 lemon (depending on how lemony you like things)

Combine all ingredients in a bowl and set aside while fritters cook. Serve fritters with Lemon Aioli.

Monday, March 17, 2008

Hidden Gems: Spoon Bread

I have a neurotic fear of getting rid of cookbooks. I have a collection that includes some ridiculous offerings, yet I can’t bring myself to give them away. Really, do I ever think I’m going to need “World Cuisine: Cooking of Britain and Ireland”? I suppose if I ever have a dire need for a soda bread or bread sauce recipe, I might. But the truth is, soda bread recipes are a dime a dozen, and I happen to hate bread sauce. I’d be much more worried about this tendency, except that I have a friend who feels the same way, so I know I’m not alone. If there’s one more like me, there must be lots more like me.

What if, my friend and I say, somewhere in that maze of aspics, veal kidneys and swiss steak, there’s some hidden gem? Some diamond in the rough, waiting to be polished up, updated with new ingredients to make it gleam?

As a concrete example of this, I have the Hood Basic Cook Book, originally published in 1933 and distributed by H P Hood & Sons dairy. The copy I have is from 1949. It belonged to my mother, who I suspect got it from her mother. In 1949 my mother was only 10, so a shade young for making such delicacies as Sweetbread and Cucumber Salad, or Fluffy Fruit Sauce. Also, it’s inscribed with her married name. The most likely scenario is that my mother had already gotten married, and my grandmother was packing up to move, and gave my mother the book to keep from having to pack it.

This treatise is typical of the beginner’s manual for young housewives of the time, which seems to have been the most common kind of cookbook readily available, along with Junior League type anthologies. At least, that’s what the collection I inherited from my mother seems to consist of largely.

This volume is chock full of advice about tracking food spending by category, finding a reliable market, and the necessity of being flexible with menu planning (what if recent frosts have reduced the supply and increased the cost of inferior produce? The string beans are poor, but Texas spinach is of unusually good quality and very reasonable, but there are some bargains in canned options. What to do?). I read the opening chapters of this book and immediately felt an unreasonable urge to run up and put on my full-skirted shirt dress, my pearl choker, and my three inch heels, shove a breast of veal in the oven, and vacuum the drapes while it cooked. It could have been written by June Cleaver, Margaret Anderson, and Aunt Bea.

However, I did find some recipes that genuinely seem worth making. A couple of types of bread and muffins, some cakes and cookies, and a side dish that turned out to be exceptionally good which I did make. It’s not exactly novel and undiscovered, but it’s a good recipe for something we’re all familiar with but may have forgotten about: spoon bread.

The recipe is straightforward, just a few ingredients, and at first glance the proportions look odd. A half a cup of cornmeal? To all that milk and eggs? Yes. The result is a very custardy, slightly grainy (but in a good way) puff of gold with a lovely brown crisp around the edges.

Another thing that intrigued me was the number of servings. Cookbooks from this era tend to be fairly reasonable about portion sizes. This was before the Supersize meal, so meat portions are given at four ounces per person, and so on. However, this is said to feed four people. If I’d actually cut this into four portions, it would have been four of the most enormous slabs of spoon bread I’d ever seen. This recipe can comfortably serve six people as a side dish.

Either way, it’s a nice find, and a variation on the polenta that has become somewhat ubiquitous and done to death. Everything is cyclical, and like bell bottoms and platform shoes, someday everything in these books is going to be reinvented and take the food world by storm, which is why I’m loath to get rid of them. I’ll be interested to see how they manage to update the aspic.


Spoon Bread
from The Hood Basic Cookbook
serves 6


For the cooking time, 25 minutes would have been fine in my oven. It can, I found, be held in 200 degree oven for up to 15 minutes, but plan for it to fall (this doesn’t change the flavor or texture—it’s just not as puffily impressive).


½ cup cornmeal
2 c milk
Salt
1T butter
3 eggs

Preheat oven to 400 degrees. Cook cornmeal, salt, and milk over medium high heat until sludgy, about 5 minutes. Remove from heat and add butter, stir until melted, then beat in eggs. Cook in 8” pie plates or 1 qt casserole (or pan large enough to hold the batter—mine was 7” x 10”) sprayed with cooking spray for 20-30 minutes until puffed and golden.


Thursday, March 13, 2008

Brief Intermission: Cheers!

I haven't abandoned my site here. I've just been feeling completely uninspired. You know, Spring is a wonderful time of year--flowers blooming, days getting longer, warmer weather--but I realize that every year I just hate early Spring when it comes to food. We're all sick to death of squash, potatoes, and roasts, but the Spring food isn't really ready yet. The beans and fruits and things you can get are all from Chile or Argentina, and the last of the Winter produce just looks sad. I've spent hours pouring over cookbooks looking for something to uplift me, but everything either speaks of short winter days and long winter nights (stews, roasts, soups) or shorts and t-shirt weather (salads, fresh fruits, summer tomatoes). Am I alone in the feeling that this is a somewhat lackluster, frustrating time of year, despite the promise of blossom and bounty to come?

I do have a recipe for zucchini fritters that I'll be posting about tomorrow (Friday) but until then, I'll leave you with with this image. You can enjoy it in early Spring, knowing that it's not the last scraping from the bottom of the produce barrel.


Thursday, March 06, 2008

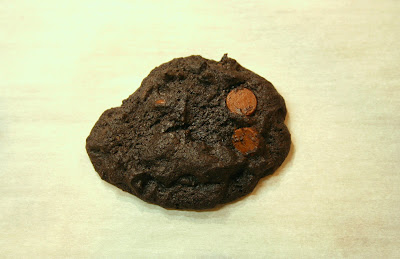
Full Up: Chocolate Chocolate Chip Cookies


The bucket, at last, is full again. For the past four days my sons have been pointing to a kitchen cabinet and saying, in a tone reminiscent of Oliver asking for more, “Mommy, the bucket’s empty.” Horrors.

The bucket, you see, is the large, deep rectangular storage container in which we keep the cookies. I love cookies, and I love having homemade ones on hand. They take so little time and effort, and they repay you a thousand times over. There are dozens of fantastic varieties detailed on the back of any ingredient packet you care to buy, so finding a good recipe is a cinch.

Usually I make either chocolate chip, or some variation on oatmeal (plain oatmeal, oatmeal raisin, or oatmeal chocolate chip). Any of these meets with cheers of approval from the Peanut Gallery. And for my part, I know they contain butter and not partially hydrogenated anything, sugar and not high fructose anything, flour and not soy byproduct anything.

This tendency to keep homemade cookies on hand may be genetic. My grandmother still does it, even though my grandfather, for whom she primarily made them, has been dead for over ten years. She’s told me that when he was alive, they’d run out of cookies and she’d say, “Well, I’ll need to make some more cookies; we’re out. What kind shall I make?” and he’d look up and say with genuine astonishment, “What’s wrong with chocolate chip?” I’m not sure if they owned stock in Nestle, but they must have been responsible for a good portion of the sale of chocolate chips over the last fifty years.

Two weeks ago I made two batches of chocolate chocolate chip cookies, one using regular cocoa, and one using Hershey’s Special Dark cocoa. The ones made with regular cocoa were fine, but not distinguished. But of the ones made with the Special Dark cocoa, I can only say, Wowowow! This stuff is my new favorite ingredient in baked goods. I think my husband thinks I might want to marry it. These cookies were rich, complex, subtle. I adored them. Interestingly, Alex did not. His complaint was that he didn’t get the contrast between the light vanilla flavor of the cookie dough (in a traditional Toll House type of chocolate chip cookie) and the chips. But what does he know?

My children are far less discriminating. If it’s round, made with butter, sugar and flour, and in The Bucket, it’s awesome. Thank you, Mommy!


Chocolate Chocolate Chip Cookies
makes approximately 5 dozen cookies

If you’re familiar with the recipe for traditional Nestle Toll House Cookies, this is going to look eerily familiar. And you’re right. Because let’s face it, there are only so many ways to make chocolate chips cookies. This is a damned good one, if I do say it myself.

2 sticks butter at room temperature
¾ cup brown sugar
¾ cup granulated sugar
2 eggs
2 teaspoons vanilla extract
2 ¼ cups all purpose flour
1 teaspoon baking soda
½ cup Hershey’s Special Dark cocoa
1 teaspoon salt
2 cups chocolate chips

Preheat oven to 375° F.Combine flour, cocoa, baking soda and salt in small bowl. Beat butter, granulated sugar, brown sugar and vanilla extract in large mixer bowl until creamy. Add eggs, one at a time, beating well after each addition. Gradually beat in flour mixture. Stir in chocolate chips. Drop by rounded tablespoon onto ungreased baking sheets. Bake for 9 to 11 minutes or until golden brown. Cool on baking sheets for 2 minutes; remove to wire racks to cool completely.

Monday, March 03, 2008

Sleight of Hand: Profiteroles

In the culinary realm, some people prefer to do easy things. Some prefer to do hard things. I’m on the fence there—I like to do easy things, obviously, because it generally means I get to eat sooner. I also like to do hard things, mostly just to see if I can. What l like best is to do easy things that turn out a product that looks like it was hard to make.

Thus it was that this weekend I made profiteroles for dessert.

Profiteroles are just puffed up dough filled with ice cream, and drizzled with sauce. The combinations of ice cream and sauce are pretty limitless, restricted only by your imagination. In this case, I used a recipe from the March Gourmet for Profiteroles with Coffee Ice Cream with Chocolate Sauce. Instead of coffee ice cream, however, I used Bailey’s Irish Cream flavored ice cream.

The chocolate sauce is a pretty standard one, made by caramelizing sugar, adding heavy cream, chocolate, and a shot of cognac. It’s deep and velvety and complex, and would make a fabulous go-to recipe for chocolate sauce any time chocolate sauce is needed (daily? Hourly?)

The part that makes this recipe look so tricky is the cream puffs. Too daunting, just can’t do it. No indeed, I promise they are the easiest things in the world.

After making the dough, you pile it all in a pastry bag…

Hold it—you lost me. I don’t have a pastry bag.

No problem, use a plastic bag with the corner cut off. Pipe the dough into little mounds…

That word “pipe”: sorry. No piping.

That’s OK, there’s another way. Take two teaspoons out of the silverware drawer. Scoop up a ball of the dough just a shade smaller than a ping pong ball. Plunk it on a cookie sheet covered with parchment paper. Bake. Remove from oven. Marvel that these look like restaurant-quality cream puffs—golden and crisp and airy. Allow to cool slightly, then continue with recipe. Serve to guests who will think you are amazing for having made something so hard.

The wonderful thing about these puffs is that because they don’t have sugar in them they can play both sides of the field, as it were. Filled up with something savory, they could make an appetizer or starter, or something nice to have with drinks. Again, the possibilities are limited only by the imagination. Creamed mushrooms with thyme, sautéed onions with some crisp chopped bacon, even the makings of a cheese ball. They can be made large or small, depending on their use. The first time I made them I made them small, and I used the teaspoon method, and I made them savory. I’ve also used this dough spread out flat on a sheet of parchment paper as a base for a sort of pizza. It works well that way, too.

The only part of the recipe that may be slightly panic-inducing the first time around is when the eggs are added. I looked at the slippery, slimy dough I had created and wasn’t sure this was going to work out. I kept stirring, and eventually the egg was incorporated in, and the dough became shiny and smooth, just as I was promised. And they turned out to be stunning. I’ve never looked back.


Profiteroles with Bailey’s Irish Cream Ice Cream
adapted from Gourmet, March 2008
serves 6

For profiteroles
1 quart Bailey’s Irish Cream ice cream
3/4 stick unsalted butter, cut into pieces
3/4 cup water
1/4 teaspoon salt
3/4 cup all-purpose flour
3 large eggs

For chocolate sauce
1/2 cup sugar
1 cup heavy cream
7 ounce fine-quality bittersweet chocolate (no more than 60% cacao if marked), finely chopped
1/2 teaspoon pure vanilla extract
1 tablespoon Cognac or brandy (optional)

Make profiteroles: Chill a small metal baking pan in freezer. Form 18 ice cream balls with scoop and freeze in chilled pan at least 1 hour (this will make serving faster).

Preheat oven to 425°F with rack in middle. Butter a large baking sheet.

Bring butter, water, and salt to a boil in a small heavy saucepan, stirring until butter is melted. Reduce heat to medium, then add flour all at once and cook, beating with a wooden spoon, until mixture pulls away from side of pan and forms a ball, about 30 seconds. Transfer mixture to a bowl and cool slightly, 2 to 3 minutes.

Add eggs 1 at a time, beating well with an electric mixer after each addition.

Transfer warm mixture to pastry bag and pipe 18 mounds (about 1 1/4 inches wide and 1 inch high) 1 inch apart on baking sheet.

Bake until puffed and golden brown, 20 to 25 minutes total. Prick each profiterole once with a skewer, then return to oven to dry, propping oven door slightly ajar, 3 minutes. Cool on sheet on a rack.

Make chocolate sauce: Heat sugar in a 2-quart heavy saucepan over medium heat, stirring with a fork to heat sugar evenly, until it starts to melt, then stop stirring and cook, swirling pan occasionally so sugar melts evenly, until it is dark amber.

Remove from heat, then add cream and a pinch of salt (mixture will bubble and steam). Return to heat and cook, stirring, until caramel has dissolved.

Remove from heat and add chocolate, whisking until melted, then whisk in vanilla and Cognac (if using). Keep warm, covered.

Serve profiteroles: Halve profiteroles horizontally, then fill each with a ball of ice cream. Put 3 profiteroles on each plate and drizzle generously with warm chocolate sauce.