Monday, August 29, 2011

Appetizers: Rosemary Honey Hazelnut Crackers


My local grocery stores used to carry crackers that were specifically flavored to go with certain types of cheeses. At this point the only one I can recall is that the celery-flavored crackers went with blue cheese. The amazing thing was, they really did complement the cheeses they were supposed to accompany. Often in the food world, you hear about things that are supposed to go together, and really, it's just a vile combination. The one that springs most readily to mind is chocolate and red wine. I'm not sure if this is the chocolate lobby, or the red wine growers association, or an evil alliance between the two, but it needs to stop because red wine with chocolate is just gross.

So like many good things in life these crackers seem to have vanished (and it's always the good things, with Exhibit A being Stouffer's vegetarian lasagna, and Exhibit B being Stouffer's broccoli in cheese sauce you could boil in the bag--clearly Stouffer's has let me down over the years, although in this case the crackers were not, to the best of my knowledge, made by Stouffer's). But something got me started thinking about those crackers, and I know crackers are a cinch to make, so why not make my own? And then I started thinking even more (your suspicions are confirmed--I admit I spend about 45 minutes out of any given hour thinking about food and food-related topics), and realized what fun I could have with cracker flavors. So I started with one that was inspired by another cracker I saw at the grocery store: rosemary raisin pecan. I swapped out the raisins and used honey for sweetness instead, and went with hazelnuts instead of pecans, because I like hazelnuts better than pecans.

I let my husband have one, and was accused of being "subtle." This rather surprised me, because I'm almost never accused of subtlety. He didn't think the flavors were super assertive, but that's the point. They're not supposed to clobber you over the head. And I think if you taste them carefully, you can in fact taste every flavor. However, if you want them stronger, add more rosemary, honey, and hazelnuts (keeping in mind that they're not intended to be a particularly sweet cracker in my execution, and if you add much more honey, you may need to add more flour--I haven't tested this).

On a technical note, it's best to try to cut all these crackers the same size, so they cook evenly. They may be a bit on the soft side when they come out of the oven, but they'll crisp up as they sit. And don't worry about appearances--they're intended to look rustic. Rustic, of course, is what we say when we mean "homemade and unprofessional." Rustic just sounds more deliberate.

Next I'm thinking of trying something like a Thai flavored cracker, with red curry paste, peanuts (or maybe peanut butter?) coconut milk and possibly curry or ginger or maybe even lemongrass. I also think if the basic dough were made with basil that they'd be an excellent thing to serve with tomato soup. I have a long list of things to try. I might even try to recreate the ones that went so well with blue cheese.

Rosemary Honey Hazelnut Crackers
Ingredients
1 cup + 2 tablespoons all purpose flour
1/2 teaspoon salt
2 tablespoons butter
1/4 cup water
1 tablespoon chopped rosemary
2 tablespoons chopped hazelnuts
2 tablespoons honey

Summary
  • In a food processor, combine flour, salt and rosemary, and pulse to combine
  • Add nuts and butter cut in 8 pieces and pulse 5-6 times
  • Add honey and pulse, then add water and pulse again
  • If dough is sticky, add 1-2 tablespoons of the additional 2 tablespoons of flour
  • Roll out 1/4" thick on a lightly floured board
  • Cut and bake at 400 degrees for 12-15 minutes or until lightly browned
Detailed Instructions
Preheat the oven to 400 degrees F.

In the workbowl of a food processor, combine 1 cup of flour, salt and the chopped rosemary. Pulse a couple of times to combine.

Cut the butter into 8 pieces and add it, along with the nuts, to the flour mixture. Pulse a few times to combine.

Add the honey, and then the water, and pulse a few more times to make a dough. Feel the dough, and if it feels quite sticky, add an additional tablespoon of flour, pulse, and check again. You may need the second tablespoon of flour as well. If so, add it and pulse a few times to combine.

Turn the dough out onto a lightly floured board or counter. Roll out with a rolling pin to 1/4" thickness. Using a knife or a cutter, cut to desired shape. I make little rectangles, but you could certainly stamp out circles or something decorative. You can't overwork this dough, so don't worry about that. You can reroll the scraps as often as you want.

Transfer the cut out dough to a cookie sheet lined with a Silpat or parchment paper. Bake for 12-15 minutes, or until lightly browned. Remove to a rack and allow to cool slightly. You can serve them warm, or let them cool completely and put them in a tin to keep at room temperature. They keep well for several days, and if they're a bit soft when they're warm, they'll crisp up quite a bit over time.

Makes about 2 dozen crackers, depending on what shape you cut them.

Tuesday, August 23, 2011

Desserts: Chocolate Caramel Tart


Caramel Chocolate Tart
Ingredients
For the crust:
8 tablespoons (1 stick) butter, softened
½ cup + 1 tablespoon powdered sugar
¼ cup cocoa powder (I use Hershey’s Special Dark)
1 egg yolk
¾ teaspoon vanilla extract
1 ¼ cups flour

For the caramel:
2 cups granulated sugar
¼ cup corn syrup
8 tablespoons (1 stick) butter
½ cup cream
2 tablespoons crème fraiche

For the Chocolate Glaze:
3 ½ ounces bittersweet chocolate
½ cup cream

Summary 
Crust
· Cream together butter, sugar, and cocoa in a bowl
· Mix in egg yolk and vanilla
· Sift over flour and mix in
· Wrap dough in plastic and chill 30 minutes to an hour
· Preheat oven to 350 degrees
· Roll out dough and transfer to tart pan
· Blind bake crust for 15 minutes, remove weights and liner and continue cooking for 10-15 minutes
· Remove crust from oven and allow to cool

Filling
· Combine sugar and corn syrup in a large saucepan
· Cook over medium heat until golden brown
· Off the heat, add in butter, cream, and crème fraiche
· Once butter is melted, pour into cooled crust
· Allow to set up for 30 minutes (refrigerate if possible)

Glaze
· Heat cream over medium heat
· Pour over chocolate and whisk until smooth
· Pour over tart and tilt pan to distribute evenly over caramel
· Let set 1 hour (refrigerate if possible)

Detailed Instructions

Crust
In a stand mixer fitted with the paddle attachment, or on a large bowl with a hand mixer, cream together butter, sugar, and cocoa powder. Add the egg yolk and vanilla, and beat in. Sift in flour and mix to combine. Turn dough out onto a sheet of plastic wrap, pat into a circle, and wrap. Refrigerate for 30 minutes to an hour.

Preheat oven to 350 degrees. Grease a 9” or 10” tart pan with a removable bottom. On a lightly floured surface, roll the dough out to a 10-11” circle (depending on the size of your pan). Transfer the dough to the tart pan (the easiest way to do this is to set your rolling pin at one end of your dough, then roll the dough up on the pin, just as though you were rerolling an unrolled length of paper towel. Position the “loaded” rolling pin over the tart pan at the edge, then unroll the dough and drape it over the pan. Press the dough gently into the pan, letting the excess hang over the side. When the dough is fitted in, roll the pin over the top of the pan and let the edge of the pan “cut” the dough. If there are places that are in any way uneven—the dough tears before you can pat it into the pan, etc—just use some of the scraps to “patch” those places). Gently line the dough with parchment paper or aluminum foil, and fill with either ceramic pie weights or dried rice or beans, and bake for 15 minutes. Remove the filling, return to the oven, and bake for 10-15 minutes more. It’s hard to tell with a chocolate crust when it’s truly brown, but when you start to smell that chocolaty smell, it’s time to take it out.

Remove from the oven and allow to cool, about 20-30 minutes. This is about how long it will take to make the filling.

Filling
In a large saucepan, combine the sugar and corn syrup. Bring sugar mixture to a boil over medium heat, swirling the pan occasionally. This will look strange at first, until the sugar starts to melt, but it will eventually all be liquid. Keep cooking until the sugar mixture is the color of dark honey. Watch it carefully—sugar goes from perfect to burnt in a twinkling. Just when you think, “Maybe ten more seconds…” pull it off. Off the heat, carefully add the butter and cream (mixture will foam up), then the crème fraiche (don’t wait for the butter to melt, just add it and stir to combine and melt the butter). Once the butter is melted, pour into the tart shell and let set, at least 30 minutes. If you can refrigerate it, this will help.

Glaze
Place the chocolate in a medium bowl. In a small saucepan over medium heat, bring the cream to a boil. Pour the cream over the chocolate and whisk until chocolate is melted and mixture is smooth. Pour glaze over set caramel, tip pan to distribute chocolate evenly, and let glaze set, 1 hour. Again, refrigeration is helpful here.

Serve in slivers, each scattered with a few grains of fleur de sel. Makes 10-12 servings.

Thoughts

Have you ever had the feeling that certain aspects of your life were jinxed? I've often heard people say they have "bad luck" with this or that. They go through three DVD players in two years, or they keep buying travel mugs that keep breaking, or every time they have the battery changed in a watch, it dies within two months. You know what I mean.

When I decided to make this tart, I had one of those moments when I was convinced I was just cursed. Rather than use my stand mixer to make this, I decided to use a hand mixer. I was feeling lazy, and the clean up would be easier, I reasoned. Years ago we bought (or were given, I sort of forget now) a hand mixer. It was just your basic hand mixer, nothing remarkable. Then one day, about three years ago, the beaters vanished. I mean they disappeared into thin air. One day I used them for something, and ran them through the dishwasher, and the next time I went to look for them, they were gone. My kids were too little to have put them in a weird place, we hadn't had any houseguests (often after we have guests, I discover things in odd places--well, odd to us, obviously not odd to them), and my husband didn't know where they were either.

We looked everywhere those things could be, and in three years they have yet to materialize. Every so often (usually when I had the bright idea to use the hand mixer) we'd say, "Really, we should just buy a replacement set--this is silly!" but it was never a priority except in the 10 or so minutes around the time during which I wanted to use the mixer. Then it was gone from my mind until the next time I wanted to use it.

Flash forward to maybe a month ago, when my grandmother was moving out of her condo and getting rid of things she no longer used on a regular basis. I asked if I could have her hand mixer, and she gave it to me. I wanted it for two reasons: first, it was a 1950-something Westinghouse (my grandparents always bought either Westinghouse or GE appliances--my grandfather worked on the Westinghouse and GE accounts when he was in advertising in the 1950s and 60s, and he was a firm believer that if you were going to tell other people to buy the products, you should use them yourself) and after 50+ years it was still going strong, and second, it had beaters.

So, to make a long story short (too late), I now have a mixer with two beaters, and this great tart recipe to make. I get out the ingredients. I get out a bowl. I get out the mixer. I get out the...wait, where are the beaters? Where are the beaters? You're never going to believe this. I couldn't believe this. I could not find those beaters for love or money. I looked everywhere. I could only stand there in bewilderment, and assume that when it came to mixers (or, more accurately, beaters for mixers), I was simply doomed. Going forward I would be one of those people who says, "I have terrible luck with..." and would finish that sentence with, "hand mixer attachments." I was completely floored. I checked every drawer, every cabinet. Could. Not. Find. Argh!

Finally, after doing what anyone in this day and age does when something utterly maddening happens (which is to say, I posted about it on Facebook), I looked one more time. And I did find them. Not in any bizarre or unreasonable place. Just toward the back of a drawer. Now I've put them in the drawer with the whisks (which I think makes sense, since that's essentially their function). We'll see how that goes.

In the meantime, this tart is amazing. I've made it twice now, and the first time it was a bit overly gooey (but really, overly gooey caramel--so what?) and the second time the consistency was perfect, but I decided that the chocolate glaze constitutes lily gilding, and I'd skip it next time. In fact, I think it would be better without the glaze, but with some chocolate whipped cream (cream with a couple of tablespoons of cocoa powder and some powdered sugar beaten into it, then whipped).

Lately my recipes have been my own. I shamelessly admit that I got this directly out of Amanda Hesser's new New York Times Cookbook (and she got it from the pastry chef at Gramercy Tavern who developed it in the first place). I wrote up the detailed instructions from my own execution. It's very rich, so a little goes a long way, but this is truly an amazing dessert. Assuming you can find the attachments to your mixer.


Wednesday, August 10, 2011

Side Dish: Fennel Cabbage Slaw


Fennel Cabbage Slaw

Ingredients
½ head of green cabbage, shredded (4-6 cups)
1 medium fennel bulb, shredded (about 2 cups)
1 large carrot, grated
Dressing
1 ½ cups mayonnaise
2 tablespoons apple cider vinegar
¼ cup apple juice
2 teaspons fennel seed, toasted and ground
Salt and pepper to taste

Summary
• Combine vegetables
• Combine dressing ingredients
• Toss dressing with cabbage mixture

Detailed Instructions
In a large bowl, combine the cabbage, fennel and carrot. In a smaller bowl, combine the dressing ingredients. Toss the dressing with the cabbage mixture. You can refrigerate this for a couple of hours before serving. If so, give it a good stir when you take it out of the refrigerator to redistribute the dressing.

Thoughts
Fennel is one of those vegetables that can be intimidating. Which part do you eat? Do you cook it or eat it raw? It’s not unlike a carrot, in that you’re supposed to lop off the fronds and eat the bottom, but unlike a carrot, it’s not a vegetable that we’ve been watching cartoon rabbits gnaw on since we were little tykes.

I happen to love fennel, both raw and cooked. It’s a great winter vegetable when you get tired of the usual suspects (broccoli, Brussels sprouts, cauliflower). In the summer, it’s great raw, with the sort of cool refreshing flavor you get with cucumbers. In fact, I add it to my cole slaw every chance I get because I think it’s a nice flavor twist with the usual cabbage. Unlike cucumber, it’s not watery, so it doesn’t weep uncontrollably into the dressing and make it nasty. (Caveat: since all vegetables have a high water content, the dressing will eventually get nasty, but not in 30 minutes or an hour, the way it would if cucumbers were involved.)

So this recipe has a double shot of fennel, with the toasted ground fennel seed and the raw fennel. The toasted fennel seed gives the dressing another dimension—it’s not just mayonnaise cut with vinegar, as so many slaw dressings are. Also, sugar in slaw dressing makes it gritty to my taste. A little is needed to balance the vinegar, but the grit is off-putting. Since I was using apple cider vinegar in this, I decided to use the juice to sweeten it. I have four kids, so there’s always a gallon of apple juice lurking around in my refrigerator.

Fennel is one of those vegetables that will eventually oxidize and turn colors that we normally associate with a bad bruise. It takes a little longer, so you can safely make this the day before you serve it, but in my experience within two days it’s looking a bit suspect, and within three it has a distinctly sad appearance. It’s still fine to eat, and tastes OK, but after the second day I do take the time to cut the little darkened bits off the fennel when I eat the slaw. It seems to mostly change at the corners and tips, so they’re easily removed and pushed aside. However, you might want to take that under advisement in your planning.

Wednesday, July 27, 2011

Side Dishes: French Fries


French Fries

Ingredients
2-3 medium baking potatoes, peeled and cut to desired “fry” size
Canola or vegetable oil to cover

Summary
  • Arrange potatoes in a large skillet, cover with cold oil
  • Turn heat to medium, turning fries after 15 minutes
  • Drain on paper towel, add salt to taste
Detailed Instructions
Using a pan large enough to hold the potatoes in no more than two layers, scatter the fries, making sure to separate them as much as possible. Any two fries that are right next to each other may stick together. It’s not possible to get every single one separate, but arranging them so that most of the fries are perpendicular to one another, versus side by side, is preferred.

Add enough canola or vegetable oil to just cover the fries. Turn the heat on to medium, and bring to a rapid simmer. You probably won’t have to adjust the heat much, but keep an eye on it. You don’t want it to boil over.

In the first 15 minutes, don’t stir the fries. After 15 minutes you can move them around gently. After about 20 minutes, use tongs to move them around and flip them over so you can see the undersides. When they start to turn golden, they’re close to done. You’ll end up with a few that get a little more brown than golden. Once they’re done, remove from the hot oil with tongs and drain on paper towel. Salt to taste.

This makes enough fries for 4 people.

Thoughts
Dinner at my house on Thursday night is the same thing every week in every season. We have hamburgers and French fries (the exception being the fourth Thursday in November, of course). By the end of a long week I’m ready for a meal that I can prep in 12 minutes, let cook largely unattended, and serve without having to listen to any whining. Everyone likes it, I get no groans of protest when I announce what’s for dinner, no one saying, “Why can’t we have x instead?”

I read about these fries in several places and they really are as easy as they sound. There are a couple of small caveats, but nothing too daunting. I use a 12” nonstick skillet. I’ve used a 12” chefs pan (with straight sides, as opposed to the sloping sides of a skillet) that was not nonstick. I recommend the nonstick because it does make it easier to get the fries out. If you use a regular pan, you’ll have to pry a few off the bottom of the pan, which is a bit tricky when what you’re doing is attempting to dislodge something that’s under an inch or two of boiling hot oil. I’m not saying it can’t be done—it can—but be very, very careful and be prepared to still do some scrubbing once you’ve removed the oil.

A word on the oil—I use canola. I buy a big jug of it at Costco. You can reuse the oil 2-3 times before it starts to break down. We just pour it back into an old oil jug and keep it on hand. When it’s time to dispose of it, we usually line a trash bag with lots of newsprint and pour the oil on that. The newsprint absorbs the oil, and goes out with the garbage. The plastic jug gets recycled.

The primary trick to these fries is not to stir them until they’re mostly done. I made them once with great success, then made them subsequent times and couldn’t understand why I was ending up with piles of fried potato bits. Then I realized I was trying too hard to keep them from sticking, and kept stirring them every few minutes. Don’t do it. Wait 15 minutes, then you can move them around. I use tongs to flip them over because the ones on the bottom get a bit more brown than those on the top. Turning them over and rearranging them gives them a more uniform appearance.

We’ve been making these for so long that I actually have a commercial French fry cutter. It can be mounted on the wall (I’m not quite to that stage yet) and the potato rests in a sort of trough that has a grid cutter at one end. There’s a plunger or pushing mechanism with a handle on it. As you lower the handle, the potato gets pushed up to and through the grid cutter, making perfect ¼” square fries. Before I owned it, I had one of those round apple slicers that switched out the apple sectioning insert for one that had a ¼” fry cutter. The fry insert never stayed in very well, and I often had to trim my potatoes so that the cutter would fit over them. After months and months of Thursday night hamburgers and fries, we bought the more efficient commercial one from Amazon. The price was surprisingly reasonable.

I’m not suggesting you rush out and buy a commercial French fry cutter (they are rather heavy and bulky to store, and they really do only do one job), but these fries are worth a try—they don’t make as big a mess as a “traditional” deep fry (admittedly they make some mess, but it’s not to the degree of the deep fry method), nor do they make your house smell like burning fat for two days. And I’ve never met anyone who whined about being served French fries.

Tuesday, July 19, 2011

Appetizers: "Mascarpone" Torta


"Mascarpone" Torta

½ lb butter at room temperature
½ lb cream cheese at room temperature
2-3 tablespoons prepared pesto
2 tablespoons chopped walnuts
French bread slices, to serve

Summary
  • Process cream cheese and butter in a food processor until smooth
  • Spread half of cream cheese mixture into a mold lined with damp cheesecloth
  • Spread pesto over cream cheese mixture, scatter with walnuts
  • Spread remaining cream cheese mixture over pesto and walnuts
  • Chill to set, unmold, serve with bread, toasts or crackers
Detailed Instructions
In the work bowl of a food processor or stand mixer (or in a regular bowl with a handheld mixer), combine the butter and cream cheese. Whir it around until they’re completely combined and quite soft. In the food processor the mixture will appear almost liquid as it flows around. That’s fine—you’re going to chill it back up in a few minutes.

Dampen and wring out a square of cheesecloth large enough to fit in your cake pan and fold over the top of the cheese. Drape the cloth over the pan and push it in a bit. Spoon about half of the cream cheese mixture into the pan and smooth it out. Carefully spread the pesto over the cheese. You want a nice layer of pesto, but it shouldn’t be thick. Just enough that each bite contains enough that the flavor comes through, and it’s obvious that it’s pesto. You want to leave as little border as possible—you don’t really want the pesto to show, but neither do you want the first few servings around the edge to be nothing but cream cheese mixture. Scatter the pesto with the chopped walnuts. Spoon the remaining cream cheese mixture over the pesto and walnut layer. This is where it gets a bit tricky, trying to smooth the cheese without disturbing the filling. Remember that what is the top right now will be the bottom, so any flubs won’t show when it’s turned out.

Fold the extra cheesecloth up over the top, press down gently, and refrigerate 8 hours or overnight.

When ready to unmold, unfold cheesecloth and position a platter over the cheese. Flip the platter and pan over and lift off the pan. If it should resist at all, tug gently on the edges of the cheesecloth to loosen the cheese from the bottom of the pan. Remove the cheesecloth. You can serve it at once, or let it sit at room temperature for a half hour or so to soften up.

Slice French bread into rounds for spreading. Toast in a 350 degree oven until lightly crisped, if desired. I often just leave the bread plain. You can also serve this with water crackers.

Thoughts
Originally this was to be a, "What do you DO with all that basil?!" post, a suggestion to make pesto, and then this recipe. And that may still be your problem if you live in most of the United States, but if you live where I live, you're wondering not what to do with all that basil. No, you're wondering if you're ever going to have any basil at all ever pretty much as long as you live. Then you sigh. Then you go buy a tub of pesto to make this recipe. Which, to be fair, is pretty great, no matter what the weather.

This was something we used to make when I worked in catering. It serves a large number of people for a very low cost per person, and it can be made in a huge batch, so it’s not labor intensive. The hardest thing to do is slice (and toast, if desired) the bread. A food processor (or mixer) does all the work for the torta. It’s molded in a cake pan, so you can get fun with the shapes if you like. We used to make this in a heart shaped pan for weddings and decorate the platter with flowers. I have also used just a plain 9” round cake pan. I cut the usual recipe in half because it makes a simply enormous amount when you use the proportions we used in catering. It’s really enough for 30 or 40 people. This reduced version I made in 6” loaf pan and it was perfect for the 15-18 people I was entertaining. To serve the larger number, just double the butter and cream cheese, and increase the pesto and walnuts to get the same even coverage (you'll just about double them as well).

The name of this recipe is in quotes because there’s actually no mascarpone in it. Perhaps at one time it was all mascarpone (if you're not familiar with it, it's a soft cheese that’s sort of half way between ricotta and cream cheese, often found in tiramisu), but by the time this recipe made its way to me, it was completely devoid of it. Just as well—it’s a little pricey to use in this volume. If you have recently won the lottery, or inherited a substantial fortune, you might try using all mascarpone, but if you’re like the rest of us peasants, the (relatively) inexpensive ingredients here will work just fine.

Sunday, July 10, 2011

Desserts: Strawberry Cream Cheese-Sour Cream Ice Cream


Strawberry Cream Cheese-Sour Cream Ice Cream

1 pound strawberries, hulled and sliced
1 cup granulated sugar
1- 8 ounce package cream cheese, room temperature
½ cup half and half
½ cup sour cream
½ cup heavy cream
2 teaspoons vanilla
½ teaspoon salt
1 ounce plain vodka

Summary
• Cook strawberries down with sugar until syrupy and soft, and cool
• Combine cream cheese, ½ & ½, sour cream, heavy cream, vanilla & salt in food processor until smooth
• Combine cream cheese mixture with strawberry mixture in a bowl
• Chill in an ice cream maker, adding vodka at the very end
• Spoon into containers and freeze until firm

Detailed Instructions
Combine strawberries and sugar in a small saucepan (I used a 2qt). Cook over medium high heat, stirring occasionally, until sugar is dissolved. This will take about 5 minutes. The strawberries will end up swimming in a light syrup. At no point do you want the syrup to boil (you could end up with strawberries in caramel if you do, which probably wouldn’t be horrible, but I haven’t tested that); if you start to see lots of bubbles, turn the heat down slightly. Continue cooking, stirring occasionally, until the strawberries are soft, but not falling apart, another 3-5 minutes. Set aside and let cool until almost room temperature, about 10-25 minutes, while you make the cream cheese mixture. You don’t want it to be too warm when you add it to the ice cream maker, or it won’t set up properly.

In a food processor, combine the cream cheese and ½ & ½ and pulse until smooth, scraping down the bowl as necessary. With the motor on, add the heavy cream, sour cream, vanilla, and salt and process until well combined and smooth. You’ll have a very thick liquid, kind of like melted ice cream.

In a large bowl, combine the cream cheese mixture and the strawberry mixture. Stir well to combine. In an ice cream maker (I have the kind with a cylinder and a motor base) add the ice cream mixture to the cylinder and chill according to manufacturer’s instructions (mine calls for letting it run for about 15 minutes). Don’t worry if it’s not really ice creamy—it will firm up nicely in the freezer. In the last minute before you turn off the ice cream maker, add the vodka and let it blend through the ice cream.

Spoon the chilled ice cream into containers (I just use disposable plastic ones) and chill in the freezer for 4-6 hours or until set to desired consistency. You can take it out and stir it from time to time (you have the opportunity to lick the spoon you use for this when you do it), and once it reaches the consistency that you like, you can serve it. Because of the vodka it won’t freeze solidly. The ice cream will keep for about two weeks in the refrigerator. Eventually it will start to form ice crystals and ice chunks. Eat it before that happens. I’m not worried about that, to be honest.

Thoughts
This is not an ice cream in the classic sense. That is, it doesn’t start with a cooked custard base. That’s a plus for me—I don’t have the patience to wait for a custard to cool overnight in the refrigerator, which is why I seldom make ice cream. This recipe is largely attributable to my friend Julie Tiramisu (as I think of her—she has a real last name, but she also has a degree in Pastry, so I think of her as Julie Tiramisu).
 
I first made this for Mother’s Day as a cream cheese-ice cream mixture. When I described it to Julie, she said, “I’d put some sour cream in it, but that’s what I do—I tweak recipes.” I said, “Me too,” and made a mental note. I jotted down some changes in my recipe book along the lines of switching out some of the ½ & ½ in the original recipe for sour cream and moved on.

Then my neighbor gave me some strawberries from her patch, because they were just rotting on the vine, she said. While the first use for them that came to mind was strawberry daiquiris, the strawberry ice cream recipe seemed more family friendly, so I went with that. The berries weren’t terribly big, but they had big flavor, so I used them, making the changes I’d noted to the recipe when Julie T and I had talked.

There are only a few words appropriate to describe the result, and all of them should be followed with exclamation points. Wow! Incredible! Amazing! You get the idea. The sour cream makes the ice cream silky, while the cream cheese adds that lovely tang. You’d think that was the sour cream that added the flavor twist, but having had it made with and without, I can assure you it’s not the sour cream that adds the zing—that’s the cream cheese—while the sour cream changes the consistency. The sour cream makes it taste like liquid pink silk. If it were possible I’d have a dress made out of this stuff, it’s so beautiful.

It’s nice to have it in the freezer for any time, but I did serve it as dessert on Mother’s Day with great success. Because homemade ice cream is somewhat out of the ordinary, it makes a nice “special occasion” dessert. When I took some over to the woman who gave me the strawberries in the first place, her whole family said, “You made it? You made ice cream?” People just don’t expect it, but it’s easy with an ice cream maker, and with a base like this, that doesn’t require overnight chilling, it’s right up my (impatient) alley.

Wednesday, March 24, 2010

Quick!

When you have children--any children, not necessarily a particular number of children--it can be very challenging to execute a reicpe.

It goes something like this:

Me: "Let's see...a quarter of a cup of flour..."

Child 1: "Mama, can I have a cereal bar?"

Me: "Wait, a cup of flour...and two teaspoons of baking powder..."

Child 2: "Mommy, where's my DS?"

Me: "No, two of soda, only one of powder..."

Child 3: "Mama, can I have some juice?"

Me : "And three quarters of a cup of..."

Child 4: "Mama, is it my turn to choose [what gets watched on TV]?"

Me: "Three quarters..."

Child 1: "Mommy, no! It's my turn!"

Me: "Three..."

Child 3: "Mama, are we going to the pool?"

Me: "Where's the white wine??"

And that was at 10 a.m.

So you can see that a recipe that contains a minimum number of ingredients, and spends most of it's time in a "hands off" state is practically a necessity. If what it delivers is also fun and tasty, well, bonus.

The recipe for "flapjack" in the March Bon Appetit magazine is just such a recipe. Flapjack, it would seem, is a British specialty, a sort of chewy oat bar. I checked my British cookbooks (of which I have three) and found no mention of it. No matter, I made it anyway. Five ingredients, a few minutes on the stove, into a pan in the oven, and 20 minutes later, a lovely little snack. I made it the first time and it was so quick and easy I was able to make it again a couple of nights later to take as a treat for my friends on the ferry. We often have these little morning nibbles, usually when it's someone's birthday. I figured we'd celebrate Tuesday with flapjack.

I made a couple of small changes and presented them to overwhelming approval. And so, because I also have a job, and need to get back to said job, I offer without further ado, my adapted recipe for flapjack.


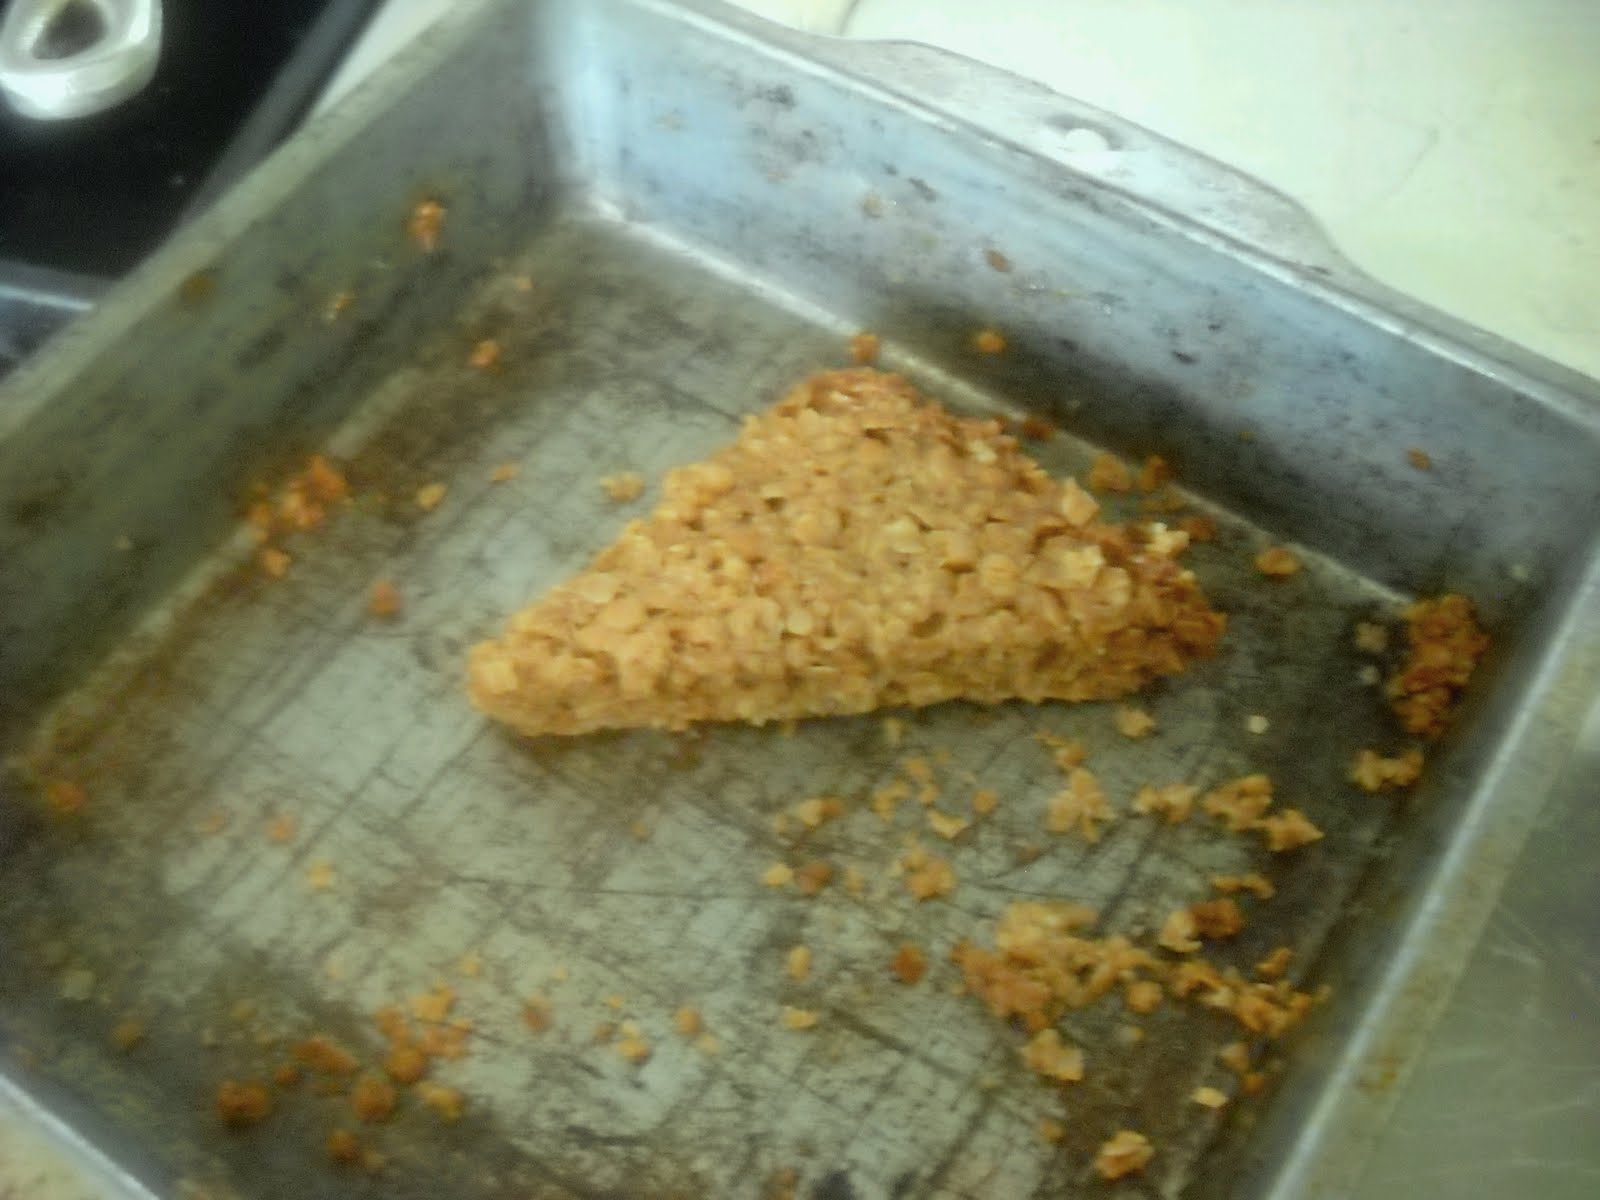
This was the last bit of it left--I had to snap a picture quickly before it disappeared. Which it did about 12 seconds later.

Flapjack
adapted from Bon Appetit magazine
makes 16 triangles

1/2 cup (1 stick) unsalted butter, cut into 8 pieces

1/2 cup (packed) golden brown sugar

1/4 cup Lyle's golden syrup (available at specialty stores and some grocery stores--it's with the maple syrup in mine)

2 cups quick-cooking oats (not instant or old-fashioned--they say "Cooks in 1 Minute!" on the label)

1/3 cup hazelnut meal (finely ground hazelnuts--I use Bob's Red Mill brand; you could also use almond meal)

1/2 teaspoon cinnamon

¼ teaspoon salt


Preheat oven to 350 and spray an 8" square pan with cooking spray. Combine first three ingredients in a pan over medium heat. Heat stirring until butter is melted, sugar dissolves, and mixture is smooth. Remove from heat and add oats and hazelnut meal, cinnamon and salt. Stir until well combined. Pat oat mixture into the prepared pan.

Bake at 350 for 20-25 minutes, until outside edges are golden and crisp. Remove from oven and use a knife to loosen the mixture from the sides of the pan, and carefully cut it into four squares, and cut each square into four triangles. Do NOT attempt to remove the flapjack from the pan. It needs to cool completely in the pan. Once cool, it goes perfectly with tea.

Sunday, March 21, 2010

Here, There, and Everywhere

Have you ever noticed that when you become aware of a thing, you suddenly see it everywhere? This happens to me a lot with magazine text. I’ll be minding my own business, and all of a sudden it will occur to me that I’ve seen a particular word or phrase recently, and here it is again, and suddenly here it is everywhere.

The two that spring immediately to mind because they are current are “go-to” and “spot on.” Suddenly every food magazine I get is offering me a “go-to” recipe for this or that, and they’re all “spot on” in terms of flavor and deliciousness.

This happens to me primarily with magazines because I am what could be not so nicely called a magazine whore. I have even been known to stoop to the Family Circle/Ladies Home Journal variety of magazine when all other sources fail me. And I have a good friend who is similarly whorish, and she and I take great pleasure in pointing out these repeated words and phrases to one another (via email, which is our primary…well, actually our only means of communication, since I now live 3,000 miles away from her). We even have a shorthand abbreviation for when one of us points out something to the other. The other person responds “TNIWBE,” which stands for “Thanks Now It Will Be Everywhere.” And sure enough, it’s inevitable.

I remember it started with “bling.” I’d never heard the term before, but she remarked that it was ALL OVER and boy was it getting tiresome. I shrugged, but before my shoulders could drop back to their original position, I’d seen it four times (OK, I exaggerate, but almost). Since then we’ve pointed out such gems to one another as “spuds” (food magazines often substitute this word for potato in articles), “tresses” (you know, hair) and “kicks” (sneakers—my friend reads more health and exercise magazines than I do; I pretty much confine myself to food magazines, so I see the non-food ones from time to time, but the food ones are under my nose all the time).

Now it’s starting to happen to me with recipes. I’ll see a recipe and think, “Oooo, that sounds good” and I’ll make it, and the next thing I know, every magazine I read has a recipe for that same thing. Or an article about food trends in the New York Times mentions it. Or I read some of my favorite bloggers, and they’re making the same thing. In fact, this happened with the recipe I have for you today. I saw it in one place, thought it looked interesting, and since I made it myself I’ve now seen it at least three other times, most recently in (surprise) an article in the New York Times.

These are called Cat Head Biscuits. And they’re from that persnickety source that the chicken pie came from, so I will Not Mention Their Name, but as usual, I had to mess with their recipe. I also saw them in a cookbook I was perusing, and in an article about a Southern cook in the New York Times Magazine. They call them Cat Head because they’re as big as a cat’s head (in theory—I have cats and they’re really more the size of a kitten’s head, but we can overlook this).

Anyhoo, the thing I like about them is that they’re a biscuit, but you don’t roll them out and cut them. You blop the dough into a cake tin or cast iron skillet and bake. I love biscuits, but I get tired of digging out my pastry board, flouring it, rolling them out, and cutting them. Plus you waste dough that way, because you can really only reroll the scraps once before you start to develop the gluten when you’re kneading it into a cohesive mass, and they start to get tough. These call for no rolling, hallelujah! Even if you think you’re one of those people who just can’t make biscuits, you can make these (I am one of those people who just can’t hard cook an egg, but that’s a story for another time).

There’s also no fretting about keeping the butter super cold. In fact, it’s supposed to be slightly soft. However, I’ve also made them with butter that was effectively right out of the fridge, and they were fine. That’s another nice thing about this recipe—it’s flexible and forgiving.

Alex and I disagreed on the amount of sugar needed in these. The recipe I saw called for none, but I really thought they needed some. The amount I added was too much for Alex, who declared them sweet enough to be a shortcake base. I said they’d need quite a bit more sugar to be suitable for that. So I’m offering you a range of sugar amount, in case you don’t like your biscuits on the sweet side and/or you want to use them for strawberry shortcake.

So here are easy, tasty biscuits that could double as dessert component. You can use them as your go-to recipe, and they are spot on.


Cat Head Biscuits
Makes 6 biscuits

1 ½ cups all purpose flour
1 ½ cups cake flour
2 teaspoons baking powder
½ teaspoon baking soda
2 teaspoons salt (I use kosher salt; if you’re using table salt, err on the side of 1 teaspoon)
1-3 Tablespoons granulated sugar (I’d add up to a quarter cup if you want to use them for shortcake, but taste before you take that leap)
8 Tablespoons (1 stick) butter cut into ½” cubes, slightly softened (or not)
4 Tablespoons solid vegetable shortening, cut into ½” cubes
1 – 1 ¼ cup buttermilk

Preheat oven to 425 degrees. Spray a 9” cake pan or cast iron skillet with cooking spray (the cast iron skillet would make a nice presentation if you were serving them directly from the pan). In a large bowl, combine flours, baking powder, baking soda, sugar, and salt. Using your hands or a pastry blender, cut butter and shortening into the flour mixture until it resembles coarse crumbs. Add buttermilk and stir to combine. Begin with 1 cup, adding remaining quarter cup if the mixture is too dry. The consistency will be very pasty and thick, which is what you want. It will actually hold a mounded shape when you plunk it into the pan. If you use too much buttermilk, you’ll get more of a batter than a dough, and they won’t work the way they’re intended to.

Using a half cup measure, or an ice cream scoop, or just a large spoon, create five distinct mounds around the perimeter of the pan. Place one mound in the center.

Bake until golden, 20-25 minutes. Cool for 10 minutes in the pan, then transfer to a wire rack. While the biscuits are cooling in the pan, use a knife to score between them (this will make them easier to remove from the pan once they’re cool). Serve warm.

Sunday, February 28, 2010

Bye Bye, Chicken Pie

Sometimes (my husband would say, often) I become obsessed with a recipe that doesn’t work, and I have to make it work, even if that means making the same thing four times and driving my family crazy discussing changes and additions. “NO,” he’ll say, calmly, “I REALLY DON’T THINK IT’S GOING TO MAKE THAT MUCH DIFFERENCE IF YOU USE SEEDLESS RASPBERRY JAM INSTEAD OF THE KIND WITH SEEDS. NOW CAN WE PLEASE CHANGE THE SUBJECT?!?”

So is it a coincidence that my kids started saying, “Bye bye, chicken pie,” just about the same time I started my relationship with this recipe? Maybe.

Let’s talk about the first time I made this pie. I saw the recipe in a magazine (and never mind which one, because it’s one that tends to be a bit persnickety about its reputation—which I have to suspect is largely self-assigned—for printing Perfected Recipes, and they seem to feel there’s no improving on them, which I have found to be Just Plain Wrong. But I digress.) and it just looked so wonderfully unhealthy I had to try it. This is not, you understand Chicken Pot Pie. There are no peas, no carrots, no onions, no potatoes. This is chicken in a creamy sauce in pie crust. That right there is three of my favorite things: pie crust, chicken, and cream sauce.

I made it with the ingredients listed according to the instructions given. They referred you to a pie crust recipe two pages ahead, which made so much crust that I probably could have made one two-crust pie, and one single crust. It was wasteful. (Although I’m willing to accept some blame as far as the crust is concerned; it’s possible I rolled it too thin the first time.) The proportions they gave for the filling were so generous that I had to use a 10” deep dish pie crust to hold it all, which meant that the cooking time was more like an hour and a half. The thing spent so much time in the oven that the sauce broke. Even if it hadn’t broken, the original recipe called for lemon zest, which gave it a weird puckery flavor that I found off-putting.

I wanted to love this pie, but it needed some adjustments.

I walked through the original recipe.

Chicken: Originally the instruction was to roast over two pounds of bone-in breasts. Not only do I not normally keep bone-in breasts on hand, that was way too much chicken. I cut it back to two breasts, and used boneless skinless, which I always have around.

Aromatics: The one rib of celery and two cloves of garlic in the original recipe didn’t add enough flavor to the sauce. I increased the garlic and tossed in one medium chopped onion. Much better.

Sauce: That lemon zest was the first thing to go. Then to up the creaminess, I added some heavy cream, and at the same time reduced the amount of chicken broth so that the sauce recipe made much less overall.

Cheese: I had intended to reduce the amount of cheese the second time I made it, but actually ended up forgetting it altogether. Frankly, I didn’t miss it. I decided it was totally optional, and in the future I won’t be using it at all.

The result was deemed good but “missing something.” I thought it was fine, but if my tasters wanted a little added layer of flavor, I was happy to oblige (since it meant I got to make the pie yet again and I’d developed a deep affection for this pie reheated for breakfast. I actually don’t recommend this, because pie crust doesn’t take kindly to being microwaved, but if you do have pie leftover and you’re willing to put up with slightly tough crust, it makes a lovely breakfast).

The third time I made it, I simmered ¾ cup of heavy cream with rosemary, sage, and thyme. Bingo.


The result is a crisp flaky crust with a heavenly creamy sauce full of shredded chicken. The cheese doesn’t add much; I barely notice it. In fact, when it cooks during baking, it makes the sauce a little watery. It thickens up as it cools, but the first piece was a little looser than I prefer.

I think this would make an outstanding brunch dish. I myself loathe quiche. It’s always watery and the crust is soggy. This is a fabulous substitute with the same sort of ingredients profile: crust, creamy filling, some protein to get everyone going. And it’s different; not the same old thing.

And so, we bring to a close my chicken pie obsession. I know my family will be grateful (or maybe not, since this means we move on to something else). Bye bye, chicken pie.


Chicken Pie
Makes 1 9” pie

Crust
12 ounces flour (about 2 ¼ cup; use weight if at all possible, it’s much more reliable)
8 ounces (one stick) butter
2-4 ounces of ice water
¼ teaspoon salt

In a food processor, combine butter, flour and salt and pulse 10-12 times until butter is in quite small pieces. With the motor running, add the ice water until the dough just comes together. Divide dough between two sheets of plastic wrap and wrap tightly. Refrigerate for 15 minutes or so, up to overnight.

Chicken Filling
2 boneless skinless chicken breasts
8 ounces (1 stick) butter
1 rib celery, chopped
1 medium onion, chopped
3 cloves garlic, chopped
1/3 cup all purpose flour
1 12 ounce can evaporated milk
½ cup chicken broth
¾ cup heavy cream
1 spring rosemary
2-3 sage leaves
2 thyme sprigs
Salt and pepper, to taste
1 bunch scallions, chopped (green parts only)
½ cup shredded cheddar cheese (optional)
1 egg + 2 teaspoons water, beaten

Preheat oven to 375. Season chicken breasts with salt and pepper, and roast for about 25 minutes, or until done. Allow to cool, then shred into 2” pieces (shredded chicken really does taste different from cubed chicken, for some reason; I hate shredding chicken—it gets under my nails and it takes forever—but it’s totally worth the improved taste).

In a small saucepan, combine heavy cream and herbs over medium-low heat. Allow to simmer while you make the rest of the sauce.

In a 3 qt saucepan, melt butter over medium heat. Add the garlic, onion and celery, and cook until softened but not coloring. Add the flour and cook about 3 minutes. It’s OK if the flour browns slightly, but don’t let it get too dark. Add the evaporated milk, cream (and all the herbs), and chicken broth. Taste for seasoning and correct as needed with salt and pepper. Reduce heat to low and simmer until sauce is quite thick.

Remove sauce from the heat and strain through a fine sieve into a large bowl. Discard solids. Stir in chicken and chopped scallions (I taste for seasoning again here). Allow to cool slightly (about 30 mins).

Roll out pie crust, and fit into a 9” (1” deep) pie pan (spray the pan with cooking spray, and be sure to spray the edge of the pan so the crust doesn’t stick when you crimp it). Pour the filling into the prepared crust, and roll out the top crust. If you’re using the cheese, scatter it over the top of the filling now. Cover with the top crust and crimp the edges with a fork. Brush the crust with the egg and water mixture.

Bake at 375 for 45 minutes to an hour (start checking at 45 minutes—the top crust should be golden, and if using a glass pie plate, you should see little bubbles around the sides of the bottom crust through the dish). Allow to cool for ten minutes. Serve.

Monday, February 22, 2010

Up Next: Chicken Pie

I've been working on a chicken pie that I'll make one last time this weekend and then reveal it to the world. I found the recipe and it just sounded amazing, but like so many things, it fell short. So I set out to retool it and work out the kinks, and if the fact that my husband ate half of the "beta" version this weekend says anything, we're almost there!

This is not a chicken pot pie. This is a chicken pie. And oh my is it a good chicken pie. It's not an everyday dinner--for one thing it takes a little time--but for a special occasion, I think it would be stellar.

OK, that's enough preview--coming soon: Chicken Pie!

Sunday, January 31, 2010

Moving On

OK, I need to get past this. You see, I've been haunted for the last...wow, almost three months now, by these eclairs! They just never turned out the way I wanted them too, and I've just been too discouraged to talk about them.

It's not that they were bad, mind. They just weren't what I expected them to be. But I watched some Julia Child a couple of weeks ago and one of the things she said was (to paraphrase), "Never apologize; just because it disappoints you doesn't mean the people you're serving know that it's not the way you intended it to be." In effect, keep your mouth shut and everyone will probably think it's just fine. Well, that surely is what happened with these eclairs. My friends thought they were just dandy. Bless them.

But to bring myself to closure here, let me explain what disappointed me. I made the choux paste, and it was fine. For all the kerfluffle out there about how tricky cream puffs are, they're not. You make the batter (you can even do it in a food processor) and steam does all the work for you (which is why I picked this particular dessert for this supper club--the theme was "air" and I felt that a pastry in which the "air" technically did all the work was right in line).

So, crisp little fingers of puffy buttery dough, the creamy custardy filling. No problem, right? Wrong. The directions for these eclairs call for lightening the filling with whipping cream. Nice idea, but guess what? You can't pipe it. If you look inside a cream puff or gougere, you'll see that the steam has indeed fluffed everything up nicely, but it leaves this sort of spider webby network of dough that you have to force aside to while you're filling them. That light airy cream just didn't have enough muscle for the job.

As a result, I was forced to slit the eclairs down the side and plop the filling in. Worst thing in the world? Of course not. Actually the way the instructions described the filling process? Why, yes. Not in line with my personal expectations? Ah, no, and this is where we come to the crux of the problem, and the aforementioned haunting.

It's not that they turned out badly, or even that they turned out differently than the recipe described, it's that they did not meet my expectations, and because I let myself down, I labeled them a flop. Of course I didn't stop cooking after this, I just stopped talking about it here. I was too mortified by my own perceived failure to come back and discuss it.

So now I am back, and I have discussed it. I didn't mention that the chocolate glaze let me down too, in part because I waited too late to make it and it didn't harden up the way it was supposed to until the next day. Again, my fault. If I'd made the chocolate in the morning, it would probably have been fine by 5 p.m. or so, when I needed to use it.

Well, live and learn. I think I have some pictures of this mortifying experience somewhere.

Right, you see? Fine. They're fine. The picture is a little heavy on glare for my taste, but I didn't edit it at all, just dropped it in here.
Now that we're past that, I'll start working on some other things that won't disappoint. I'm not even going to bother giving you the recipe for the eclairs, I'm so annoyed at how I let them ruin my life for three months. They are dead to me. Let's move on!

Saturday, November 07, 2009

Chocolate Eclairs in Real Time

We have a quarterly supper club that meets tonight. Our theme for this meal is "air." All the components have to have some relation to air. That relationship can be as vague or as specific as desired (and if someone says, "I'm serving rack of lamb, because lambs breathe air," I won't be the least bit upset). The hostess provides the entree, and the other three couples provide an appetizer, sides, and dessert. We rotate who does what, and tonight I'm to provide dessert.

I cast aside the obvious "air" references in dessert--meringue because it looks like the clouds, souffles because they're airy. Instead I chose chocolate eclairs--the heated air is what causes the choux pastry to puff. Choux pasty is so easy to make, it's a shame people don't make it more often.

I decided to do this recipe in stages. That way, if any one step failed, I could chuck the whole thing in the garbage and go buy a pavlova or some Miss Meringe cookies at the grocery store. So I thought I'd share this as I made it.

Step one is the pastry cream, because it needs to cool for at least an hour, and it was the most intimidating piece to me. I've made choux pastry many times, but I can't recall ever having made pastry cream. Anything where I'm heating up raw eggs or yolks to the point where they could potentially scramble makes me a little uneasy.

And truth be told, I think I did scramble it a little, but at the end of the recipe the pastry cream gets folded into whipped cream, so I think the stirring I'll be giving it prior to the folding will take care of any little lumps.

But here's the result of my efforts:

Not bad. This spoonful went right in my mouth, of course, and I can report that it has a nice vanilla flavor. It looks like vanilla pudding, and I guess that's pretty much what it tastes like (indeed, pretty much what it is). But I'm pleased that it turned out and I don't, at this point, at least, have to make a grocery run.

Vanilla Pastry Cream
Enough for 12 – 13 éclairs
From Fine Cooking magazine

1 cup whole milk (I was out of whole—I used ½ and ½)
3 large egg yolks
¼ cup granulated sugar
2 tablespoons cornstarch
1/8 teaspoon salt
½ teaspoon vanilla extract

Warm the milk in a medium saucepan over medium heat until tiny bubbles appear around the edges. In a medium bowl, combine egg yolks, sugar, and salt. Whisk to combine. Add the cornstarch and salt and whisk. Pour half of the hot milk into the egg yolk mixture and whisk well. Add remaining hot milk and whisk again. Return the milk mixture to the saucepan and cook over medium heat, whisking constantly. Continue cooking until mixture thickens to the consistency of vanilla pudding. This will happen all of a sudden. One minute you’ll be whisking milk, the next minute you’ll look up to see how hard it’s raining and when you look down, you’ll have pudding. It may look lumpy as it starts to thicken, but it will smooth out.

Remove from the heat, and scrape into a clean bowl. Whisk in the vanilla, and cover with a sheet of plastic wrap directly on the surface of the pastry cream. Refrigerate until chilled, at least an hour.

Next up: the dough and the ganache, but not until this afternoon.

Wednesday, October 21, 2009

Where Have I Gone?

Nowhere. I'm still here, and I still cook. Lately, however, I've been too exhausted to actually photograph what I've cooked.

Let me 'splain.

For reasons that I can no longer recall (probably because of the aforementioned exhaustion), I decided it would be a good idea--no, a great idea--to run a half marathon. Of course! Because since high school, the only running I've done has been out of patience, out of time, out of money, and out of energy. And of course picking up one foot and then the other didn't play much of a role in any of that. So why on earth would I not run a half marathon? I can see no way in which this carefully constructed plan could possibly fail.

I picked the Seattle half marathon, which is held the Sunday after Thanksgiving each year. The choice was based more on convenience than on any characteristic of the race, or out of consideration for how spectacular the weather will be (because if there is anything the weather in Seattle will be on the Sunday after Thanksgiving, it is not spectacular). I started training. By about last Sunday (six weeks out from the race), I realized I was hopelessly undertrained. I had only been training for five weeks prior to that. So I reconsidered. I had seen an ad in a running magazine for a half marathon at Walt Disney World in the spring, A quick internet search revealed the Disney Princess Half Marathon on March 7th.

I posted a Facebook status asking if anyone wanted to do it with me. One friend, a dedicated half marathoner, said she would. And so, dear reader, I am comitted to training between now and March 7th for a half marathon. This means I get up at 4:30 a.m. many mornings (I sleep in until 5 on the weekends) and run on a treadmill in my basement. As a result, I am exhausted. I manage to get through work and evenings with my kids, but I spiral down quickly from the time I turn out their lights. I am a lot of fun to be around.

As a second circumstance in all of this--and another major contributor to my lack of posts--is that I am doing more of my own recipe development. I still read all the wonderful food magazines I get, but I'm spending a lot of time using those as inspiration, rather than as instructions. It takes a lot longer, I'm discovering, to perfect something you dreamed up, instead of making something from a recipe that someone else has spent hours conceiving and perfecting. And it goes without saying (although here I am saying it anyway) that it takes even longer still when you have a full time job in an industry unrelated to food, four kids, a husband, and a house (no dog--come on, I'm not crazy, you know). I have a couple of things in the works, but to tide you over until then, here's the Chicken Pot Pie I made for dinner last night (and was too dead tired to photograph). Because I make this for my kids an average of twice a month, I've got the recipe down.

Chicken Pot Pie
makes enough for two adults and four hyper-picky kids with leftovers for the adults' lunches. It would probably serve 4-6 normal people, depending on how ravenous they were.

Filling
3 boneless skinless chicken breasts
3 tablespoons butter
3 tablespoons flour
2 cups chicken broth
1 cup heavy cream, ½ and ½, or milk
About 1 c frozen peas (no need to thaw)
About 1 c frozen pearl onions (no need to thaw)
2 large carrots, peeled and cut into ¼” dice
Salt and pepper

Poach chicken breasts until cooked through and set aside to cool. When cool enough to handle, shred meat and set aside.

Preheat oven to 350. In a large saucepan melt butter over medium heat, and add flour. Whisk over medium heat, about three minutes. Add chicken broth and whisk until slightly thickened. Add cream (heavy cream tastes best, of course, but if you can’t bear the thought of the fat, use half and half or milk; it will still be good, just not as rich). Season to taste with salt and pepper. Add shredded chicken and vegetables. Continue cooking until thickened, about 10 minutes (the ice on the frozen vegetables will thin the sauce down, but it doesn’t take long to thicken back up). Taste and correct seasoning. Pour chicken mixture into a 2 quart casserole coated with cooking spray. Top with biscuits. Bake about 15 minutes, or until biscuits are golden.

Biscuits

2 cups all purpose flour
1 tablespoon baking powder
1 teaspoon baking soda
1 teaspoon salt
5 tablespoons cold butter, cut in small pieces
1 cup buttermilk

In a food processor, combine flour, baking powder, baking soda, and salt. Pulse two or three times to combine. Add butter and pulse until mixture resembles coarse meal (maybe 12 or 14 times). With the motor running, pour the buttermilk into the feed tube slowly, watching the consistency of the dough. Once it pulls together, stop pouring and turn off the machine. Check dough by giving it a pinch—if it sticks together, it has enough liquid in it. Odds are you will not need all of the buttermilk.

Turn dough out on a floured surface and pat out to about ¾” thick. Using a biscuit or cookie cutter, cut out as many biscuits as you can. (I have used cat shaped cutters, hearts, stars and plain circles—be warned, the more complex the shape, the less likely it is to “work” as a biscuit. Kids think the shapes are cute, though.) You’ll probably have about 16 biscuits. Place these on top of the pot pie filling and bake as directed above.

Quantity Note: you can make more of this casserole, and cook it in a 9”x13” pan. To do so, you’ll need an extra tablespoon each of butter and flour, an extra cup of broth, and about an additional half cup of cream or milk. You’ll also want to up your vegetables and poach another chicken breast. I don’t make it in that big a pan because my kids eat like anorexic sparrows doing a Ghandi imitation, and I used to wind up with three tons of leftovers. While I like this chicken pot pie, I prefer not to eat it for breakfast, lunch and dinner for a whole week. I'm just fickle that way.

Monday, October 05, 2009

No! Not Gourmet!

http://mediadecoder.blogs.nytimes.com/2009/10/05/conde-nast-to-close-gourmet-magazine/?hp

I am shocked! I get that ad revenue is down, I get that they need to cut costs, but to close down Gourmet! Get rid of Lucky, get rid of one of your golf titles, cut Architectural Digest down to six months a year, but please don't get rid of Gourmet!

I have to be completely honest--when Ruth Reichl took over, like so many others, I declared the magazine to be ruined, and let my subscription lapse. I felt a little like I did in high school. You know, you're friends with someone early on, then they join some club or team and you feel like their new friends change them. The new person they've become just isn't someone you want to be friends with at that point in your life. You both move on. Then, one day several months or years later, you find yourself interacting with this person--maybe you're both on the yearbook committee now, or you're both in the spring musical production--and you realize that you've both changed more, and now you can be friends again.

Well that's how it was with me and Gourmet. Gourmet's new friend Ruth changed it, and not for the better in my opinion at the time. Then, one day, maybe two years ago now, I picked up a copy on the newsstand. I don't know what prompted me--maybe it had a pretty cover. Maybe I had read something on a food blog about a recipe that sounded good (let's be honest--that was probably it). Whatever the motivating factor was, I picked it up and kept picking it up. And then I subscribed. And now I make probably two recipes a month out of it, and flag even more for future use. I love what Gourmet has become--it's much more in synch with how I cook today. Lots of weeknight recipes, with a nice mix of fancier stuff for weekends and holidays when I have more time for cooking.

In fact, so completely have I about-faced on Gourmet that when a friend told me she had old issues from 1999 - 2004 or so that she would let me I have, I jumped at the chance. That span represents the almost entire time that Gourmet and I were estranged. I got a second chance! The stash even included the September 1999 issue that was the first one on which Ruth Reichl worked, and which created such an outcry (both for and against), as well as the November 1999 issue in which said outcry was recorded. I also have the August 1999 issue, which was the one just prior to Reichl's taking over, and which followed the older format. It's fascinating to read the two together.

Of course, the magazine has come even further now, with bigger changes that are nice to see and note. In the period BR (Before Ruth), Gourmet's opinion was clearly that there were no restaurants worth troubling with anywhere but New York and LA. Ruth expanded the restaurant reviews to the whole country. Gourmet used to be full of huge beautiful pictures of Italy, Francy, Germany, Laos...big glossy shots of places far away, along with travel tips for when you got to go (ha!). They still cover some travel, but it's not the main focus any more. The main focus is clearly food. Food that you could cook on Thursday night, as well as things you could make for your guests on Saturday night, or for Thanksgiving dinner. I feel it's more well-adjusted in the past couple of years. The Quick Cook or Gourmet Every Day columns from so long ago often had things like oatmeal cookies and cranberry sorbet. Perfect! Just what I serve for dinner every night! No, now you get things like steak, pork chops, and shrimp, as well as vegetarian choices. Much more useful.

I'm just hoping Conde Nast gives Gourmet a second chance. I looked at the Conde Nast website, bu there was no "contact us" button, so I guess I'll send an email directly to Gourmet. They can't do this! I already subscribe to Bon Appetit, Food + Wine, Martha Stewart Everyday Food, Cooking Light, Fine Cooking, and Donna Hay Magazine. On the newsstand I often buy The Food Network Magazine, La Cucina Italiana, and Delicious. I refuse to buy Paula Deen, Rachel Ray, anything Taste of Home, and anything Cook's Illustrated publishes. There will be a sad hole left in my cooking life.

Tuesday, September 29, 2009

A Little Grown Up Food

I type that title as I sit here eating a "bus cookie" (it's a cookie in the shape of a school bus--what else?), but I've been starting to feel the need in my life for a little adult food. Something a kid wouldn't eat in a billion years, and frankly, I wouldn't expect them to. For the last month I've been reciting the mantra, "You will eat what we eat" (OK, not that heavy-handed, but that's the been the gist of it, I assure you) and serving my kids dinners that are sort of a middle ground between the more elaborate meals we used to eat at 9:30 at night, and the microwaved chicken nuggets and canned corn that the kids used to get at 6:30.

So we're eating Chicken Enchilada Casserole (yes, I know that's not what it's called, but that's what we call it), and simple sauteed chicken breasts and the like. And it's going pretty well. I think the kids have finally realized this is one of Mommy's crazy ideas that's not going away any time soon (like that pesky tooth brushing thing, and that annoying thing where she makes us put our trash in the trash can...if you can imagine).

But yesterday I sort of had a craving for something I knew they wouldn't like. You see, as much as I'm ashamed to admit it, and as much as I try not to do it, I do find myself getting huffy and offended when they won't eat the food I cook for them. My rational brain knows full well that they're not rejecting me, but food is such an extension of me, and I feel so personal about it, that I have to fight my irrational brain over this one. So if I made something that started out with things they didn't like in the first place, and then combined them in a way that I knew they wouldn't like much in the second place, I wouldn't get all snitty when they gave me that lip-curl when I told them what it was.

Result: Cream of Mushroom Soup. What kid likes mushrooms? I'm sure there's one somewhere, but none of them are mine, so mushrooms were an easy starting point. When it comes to soup they eat it's Campbell's Tomato made with 2/3 of a can of milk only. Period. Nope, not even chicken noodle. Isn't that strange? Maybe we'll try chicken noodle again this winter, but last winter it was roundly rejected.

Anyway, yesterday was a perfect soup day because it really was the first day of fall here in Seattle. We've been having this incredible Indian summer thing where the temperatures were in the 70s and the sun was shining and no rain. Well that all ended this morning. As I trudged to the bus stop, I found myself thinking, I'm cold. And my feet are cold. These are stupid shoes to be wearing. And this jacket isn't heavy enough. And I need a scarf. And maybe some gloves. And to top it all off, it's raining. Well, sprinkling, but drops are hitting me on the head and on my inadequate-weight jacket and dampening the toes of my stupid shoes, so I classify that as rain.

And did I mention that sunrise is now around 7:05? Somehow a 7 p.m. sunset doesn't bother me, but when the sun comes up at 7 a.m. and I should really have a flashlight out at the bus stop (so the bus sees me, and stops, you see), well, that's winter to me, baby.

So really I didn't intend for this to be a long-winded whine about summer being over and gone. I love fall, really I do. I like Halloween and all the fall festivals and apple picking and making things with apples and using winter squash in stuff and Brussles sprouts (oh, how I love Brussels sprouts!) and I don't mind the weather being colder, but I also don't like being caught unprepared. Tomorrow I know not to wear stupid shoes, to dig out my warm pea coat and scarf, and to bring the big bulky sweater I bought in Ireland ten years ago in to the office so I can be warm all day.

And tomorrow, like today, I can have Cream of Mushroom soup for breakfast again (yes).

Cream of Mushroom Soup with Sage


1lb mushrooms cleaned and sliced (I used Cremini)
2 slices thick bacon, cut in 1/2" dice
2T chopped fresh sage
3T butter
3T flour
2c chicken broth
2 cans 2% evaporated milk
1/2 cup heavy cream
Salt & pepper to taste

In a large saucepan over medium heat, saute bacon until crisp. Remove from pan and set aside, reserving drippings in the pan.

Over medium heat, saute mushrooms in reserved drippings until all water evaporates. Add chopped sage for the last minute of cooking time. Remove mushrooms from pan and set aside.

In the saucepan, melt butter over medium heat. Add flour and whisk to form a roux. Cook 1-2 minutes. Add chicken broth and cook until thick. Add evaporated milk and return 1/2 of mushrooms to pan. Thicken slightly, about 10 minutes. Season with salt and pepper. Remove pan from heat and using an immersion blender (or blender or food processor), puree (be careful when blending hot liquids).

Return pan to heat and add remaining mushrooms to soup. Cook until thickened slightly 5-10 minutes. Add heavy cream and stir to combine. Taste and correct seasoning. Serve sprinkled with reserved bacon bits.

(Alternatively, all mushrooms can be returned to the pan at once prior to blending.)

Monday, September 21, 2009

A Glimpse

I'm dipping in here to assure that I haven't been run over by a cement mixer, or fallen off a ferry or any such thing. I've been somewhat lacking in imagination and motivation lately. I notice this across the food blogging nets--oh sure, some people are devoted and regular publishers (Cate, for instance, and also Deb--and if a woman who gave birth and could post about it two days later can post, what kind of a worm am I??), but a great many of the blogs I read on an ongoing basis are showing a sort of end-of-season lagging.

Oh sure, I've cooked--we have to eat, after all. But nothing has been very inspired, and even the things I've made for fun, as opposed to those things I've made out of the utilitarian need to provide sustenance for my family, seem to let me down. I made a Nutella swirl pound cake just this weekend that disappointed me horribly. It was my own fault, I'll allow that--I didn't realize one of my ovens had such a ghastly hot spot in it--but the fact remains that I was let down.

Is this the change of season? I always think of Ma in "The Long Winter" saying, "Well, it's to be expected; it's the equinoctial storm," or words to that effect when the autumn rains started early before that long winter began. Maybe this is, for me, an equinoctial storm of sorts, in which I hit a lull or down period before the weather officially changes and the seasonal foods change over. I want very much to make Brussels sprouts, or beef stew, but it's not time yet.

I did spend several hours this weekend making tomato sauce out of my San Marzzano tomatoes. I still need to put it through the food mill, but the tomatoes are cooked down. And may I say right now how much I love my food mill? A blender or a food processor, while they do an admirable job of pureeing things, doesn't strain out the icky bits. The seeds, the skins, any woody or fibrous bits, get left behind with the food mill, where they remain with the blender or the food processor (oh sure, you can strain, but that's an extra step; the food mill does both at once).

On another up note, a friend gave me several years' worth of old Gourmets and Bon Appetits she found while she was cleaning out. I mean like two boxes full. And old--early 90s. But food never goes out of style (even if the plates it's served on do, and let me tell you, the prop styling completely dates these things, to the point of hilarity). We're even having two dinners this week that are from a 1996 Gourmet. That's the year I got married.

So I'll be back shortly!

Tuesday, September 01, 2009

A Minor Miracle

While I have no pictures to accompany this, I had to post about it, because it’s just such a thrill to me. I had to share.

First I must start with a basic, albeit rather embarrassing fact: my children do not eat What Mom and Dad Are Eating. Or rather, they didn’t (but I’m getting to that).

When my oldest was a baby, I made a conscious decision. Alex and I both worked 45 minutes from our home (or more, depending on the traffic). Although we left work at 5 each day, we didn’t get home until around 6, which meant I had to choose: feed the baby “our” dinner, which might take as much as an hour to cook, or feed him something “fast” (read: frozen and microwaved) and get him into bed at a reasonable hour. It’s to be noted that we had (and still have) an early-to-bed-early-to-rise kinda kid. By 7 p.m. he was spent and ready for sleep. I felt that forcing him to eat then would be Just Plain Wrong.

Thus it was that my child (and his subsequent siblings) embarked on a diet of chicken nuggets, macaroni and cheese, and frozen pizza. What they lost on the nutrition front they made up for on the well-rested front. Parenting is about making choices.

Flash forward six years. Add to the image three more children, a commute that now involves a ferry ride (making for a very reliably-timed arrival home), and two parents who are tired of eating at 9 p.m. or later. Also, consider that over the past couple of weeks the two middle children have been coming downstairs for one reason or another after they’ve been tucked in and putting away the remains of what Mommy and Daddy ate very happily, including a chicken breast with anchovies and capers. Bells and alarms went off in my head quite loudly. This. Would. Change.

Yesterday was what I was calling the Dawn of a New Era in our household. My pediatrician told me awhile ago that by school age, children should be able to eat with the family and eat what the family eats (meaning, there’s no need to fret about undiscovered food allergies, or be excessively concerned about things like choking hazards). I have a good friend who is driven batty by my descriptions of what we had for dinner, and my comment that, Lord no the children did eat that; are you kidding me? The combination of the doctor, my friend, the willing consumption of seemingly non-kid food by half my children, and my own impatience with the situation all contrived to push me into this New Era.

As of last night, my children will eat what we eat. Sure, sure, I may modify it for them—the broccoli we’re having tonight will be steamed plain for them, while the plan is to snazz it up for us with things like soy sauce—but the general rule is: one meal for all. The oldest begins first grade tomorrow, so the time is right.

And last night was pretty successful. I sautéed chicken breasts in oil and a little butter, then made a pan sauce with some chicken broth, Dijon mustard, and a splash of heavy cream. I roasted potatoes in the oven, and glazed carrots for the grownups. The kids got raw carrots to dip in the dip of their choice, with the participants being evenly divided into the ketchup camp and the blue cheese dressing camp. Everyone tried what was new and weird, ate carrots and apples, and made pretty good inroads into the weird stuff.

Good times.

I am now planning meals with my kids in mind, which means nothing that requires two hours to cook on a weeknight, and looking for things that can be modified if necessary. Tonight we’re having roasted pork tenderloin with Asian flavors (said flavors have yet to be identified, but I predict hoisin sauce will play a significant role in the preparation), the aforementioned broccoli, and rice. Only the pork will be labeled as “weird” by my kids. Rice and broccoli are big favorites. We shall see how this goes.

And so, because I can’t leave you with no recipe at all, here’s the carrot recipe I used. Sorry there’s no picture.

Glazed Carrots
from Ten Dollar Dinners by Melissa d’Arabian

½ cup water
½ cup chicken broth
1 Tablespoon butter
1 Tablespoon brown sugar
½ teaspoon ground cumin
¾ lb carrots, peeled and cut on the bias into rounds
Salt & freshly ground black pepper to taste
1 teaspoon lemon juice
Chopped parsley to garnish

Combine first 5 ingredients in a medium skillet (water through cumin). Stir, and allow to come to a boil. Add in carrots, stir to coat, and cover pan. Allow carrots to steam, about 5 minutes or until tender. The original recipe says to reduce the sauce to a glaze with the carrots in it, but I thought they might get overdone, so I removed them to a bowl with a slotted spoon, cooked down the glaze, and returned them to the pan, stirring to coat. Season with salt and freshly ground pepper to taste. Remove from the heat, add lemon juice and stir. Garnish with chopped parsley.

Tuesday, August 04, 2009

Tomato Dilemma


Tomatoes. When I say the word, you immediately picture a big juicy beefsteak, or possibly a humorously misshapen San Marzano, so perfect for sauce. Probably what does not spring to mind is a sweet little cherry tomato. Cherry tomatoes are often mere accessories to a salad, tossed on at the last minute, exploited for the color they add to plain greens, but without getting much in the way of respect or appreciation.

This was driven home for me this summer when I decided to grow tomatoes. We have a 40+ foot long porch on the front of our house. Because we spent most of our budget on kitchen appliances, we had nothing left over for landscaping, so our “lawn” strategy was, “Let a bunch of weeds grow and keep them cut short and guess what? They look like grass.” So this year we invested some money in raised beds and topsoil. Rather than put in a bunch of ornamental plants, I went with the more practical (and certainly more delicious) vegetables: four kinds of tomatoes, zucchini, swiss chard, carrots, lettuce and peas (and note to self, next year MORE PEAS! The kids will eat them out of the pod off the vine; we want to encourage this behavior). The front of the house is a southern exposure, so we were pretty much guaranteed success.

This has been a particularly sunny and uncharacteristically hot summer in the Pacific Northwest (in fact, so much like where I grew up has it been this year that I’ve begun referring to it as the Pacific Northeast. Ha, I’m such a card). Day after day the sun blazed down on my garden, and the carrots came up and the chard flourished. The tomatoes got enormously tall and set fruit, and then they refused to ripen. There were these huge green tomatoes all over my plants, but they simply wouldn’t turn red. I came within an ace of turning them all into one of my favorite side dishes, fried green tomatoes, and calling the tomato season a bust. I was counseled to have patience. My time would come, I was assured.

But then! One tomato ripened. One…yellow cherry tomato. A yellow cherry tomato? Well, beggars can’t be choosers, and shortly I had lots of ripe cherry tomatoes, mostly yellow, but a few red. What was I going to do with these? Oh sure, I could put them in a salad, but as I said, I think that’s so dull. It’s that whole exploitation thing I was just on about. I had to be true to myself and actually do something with them. But what?

And just as I was about to cave to the defeatist voice in my head, the one that kept saying, “You have to do something with them, you can’t just let them rot in that bowl. Go on, just make a salad and put them in there. You really have no other choice,” (this, incidentally, is the same voice that almost had me rip all the green tomatoes off the plants and fry them up—a persistent but so often wrong voice that should really just shut up, but I think I’m stuck with it), along came the August issue of Gourmet magazine, with a solution for my dilemma. Take your cherry tomatoes, blanch and peel them, then sauté them. Their suggestion was vodka, my rebuttal was white wine and anchovies.

Normally blanching anything seems too fiddly and time consuming for me, but cherry tomatoes slip from their skins so easily it’s no trouble. The little hussies seem anxious to disrobe for you. It’s almost obscene. And then you’re left with these slightly mushy little characters that (in my case) get rolled around in some olive oil over medium heat until they’re warm through, then they’re jolted with a shot of white wine and get some anchovies mashed around with them, and the whole thing cooked down to a syrupy consistency. You should taste before salting, but a grind or two of pepper is nice. I scattered these with chopped flat leaf parsley because I have so much of it in front of my house that people walking past can be heard referring to it as, “that house with the parsley shrub in front of it.” You could use chives or sage or oregano, depending on which herb is taking over your herb garden this year.

This would be a different summery side dish, something you don’t see every day, and lovely with roast chicken. A friend to whom I described this said it sounded to her like it would make an excellent topping for a bruschetta, which I think it would. You’d want to smash the tomatoes and cook off some of the juice that’s released, but then they’d be perfect on a toasted or grilled slice of Italian bread, rubbed with a clove of garlic if you’re feeling particularly devilish. If you’re serving them as a side dish, take care not to heat them until they pop. If they do, well, when life hands you overcooked cherry tomatoes, make bruschetta.

White Wine-Anchovy Glazed Cherry Tomatoes

adapted from Gourmet magazine

24-36 medium cherry tomatoes (a mix of yellow and red, or all one color; the round ones are easier to work with than the grape tomatoes)
1 tablespoon olive oil
¾ cup dry white wine
6 anchovy filets, patted dry
Freshly ground black pepper
Kosher salt (optional)
Chopped fresh parsley (or herb of choice)

Using a sharp paring knife, cut a small X in the bottom of each tomato. Drop in a pot of boiling water for 10 – 15 seconds. Scoop out and plunge immediately into a bowl of ice water. Remove skins from tomatoes.

In a large skillet, heat olive oil over medium heat. Add cherry tomatoes and cook for about 5 minutes, or until tomatoes are heated, but not bursting. Add anchovies and wine to pan, and mash anchovies with a fork to encourage their disintegration. Taste for seasoning, and add pepper (you probably won’t need salt, but you can add it if you think it needs it). Reduce over medium heat, another 3 to 5 minutes, or until sauce has a syrupy consistency, but tomatoes are still whole.

Remove from heat and scatter with fresh chopped herbs. Serve immediately.