Saturday, August 16, 2008

Lame: Why I Haven't Posted in Awhile

So I received a politely worded complaint (Molly) that I hadn't posted anything and that perhaps the pea soup had lost the allure and glamour that it had a week or so ago.

Well, yes. Here's what happened.

I tried to make some Jam Thumbprint Cookies from a Shaker cookbook I have. I don't know if the Shakers were just more talented makers of Jam Thumbprint Cookies than I am, or if the recipe is a total sham or what, because these were a complete flop. They started out looking quite promising (as you can see), but after I baked them, the cookies refused to hold up their end of the bargain and contain the jam at all, and the jam melted everywhere and all I can say is thank God I used a Silpat, because everything came right off with no problem.


So I need to try these again (because they had awesome flavor and if I can just get the darned jam to stay in the darned cookie, we'll be good to go), and I need to write up some nice peanut butter cookies I made last week and I promise that I'll get a few things up here this week and next for your viewing pleasure.

I'm going on vacation for a couple of days this coming week so while I may not be able to post a lot, the hope is I'll be able to cook a lot and have something to post. Sometimes I think I'd have been better off starting a political blog; at least those write ups just depend on other people doing something and me forming my opinion of their behavior. Then again, that would involve my having to follow politics closely, which would probably cause me to start drooling and/or fall into a comatose state because I personally find politics to be stupefyingly boring. Food is way more interesting. And really, if all the politicians in the world were to disappear, would we continue to exist? What if all the food in the world were to disappear? See? So we can clearly deduce which is more important.

With that, I'm off the to the farmer's market!

Sunday, August 03, 2008

In the Bag: Creamy Pea and Chicken Soup


This is supposed to be an entry to this month’s “In the Bag” competition over at A Slice of Cherry Pie. If it’s too late to make the roundup, then it’s just a post of a yummy soup.

Here in the Pacific Northwest we have an interesting summer phenomenon. We call it “Fall.” You see, summer kind of comes and goes. One day will be beastly hot and send us all scurrying for the swimming pool and thinking about what kind of salad to have for dinner. The next day we’ll need windbreakers in the morning, and there will be enough breeze all day long to make you feel like a little soup for lunch might be a good thing. At first this sort of annoyed me; come on, I though, pick a season. But now I rather like it. When I lived back east, in an area known for five months in a row of weather forecasts that consisted of, “Hazy, hot and humid, with a chance of afternoon thunderstorms,” we’d get to early August and I’d start thinking, “An overcast drizzly cool day would be a pretty welcome break right about now…” but it seldom happened. Now it happens all the time.

And so, because of this phenomenon, I created this soup using some springy/summery vegetables, but with a little weight in the form of the chicken to warm you and stay with you a bit. I bought the peas, but I had a yellow squash that came in my Community Sponsored Agriculture box. It was perfectly fine, but had some appearance issues. It wasn’t really pretty enough to just eat steamed or sautéed, but there was nothing wrong with it, so I added it to this soup. You could just add another half cup or so of peas if you didn’t have the squash, or you could use zucchini or another summer squash in its place.


In keeping with the In the Bag ingredients for this month, I added some grated parmesan at the end for flavor and a little saltiness. Be sure you taste the soup after adding the parmesan, but before adding any additional salt. Depending on your palate, you may find the parmesan (and the pancetta used at the beginning) make it salty enough.

This soup is going to be my lunch for the next few days, along with a slice of toasted bread with radish butter (a stick of butter with a half dozen radishes that have been diced up fine mashed into it). If you have an unseasonably cool summer day, you might give this a try. It would also be fine with frozen peas as an early Spring luncheon or starter to an early Spring dinner. It’s a lovely shade of pale green flecked with the darker green tarragon, and has the flavor of the peas and the chicken, but with a hint of licorice from the tarragon.


Creamy Pea and Chicken Soup
makes 6 servings

1 teaspoon olive oil
4 slices pancetta
1 ½ pounds boneless skinless chicken breasts, cubed
1 medium onion, chopped
1 medium yellow squash, cubed (optional, or you could use zucchini, or just another handful or two of shelled peas)
1 ½ - 2 cups shelled fresh peas
2 cups chicken broth
½ cup heavy cream
½ cup grated parmesan, plus extra for garnish
1 tablespoon chopped fresh tarragon
Salt and pepper

In a Dutch oven or large sauce pan over medium high heat crisp the pancetta in a teaspoon of olive oil. Remove from pan and reserve. Add cubed chicken and brown, about 7 minutes. Remove chicken from pan with a slotted spoon and reserve.

Reduce heat to medium, add onion to pan and cook until soft, about 5 minutes. Add peas and squash and cook until soft, about 7 to 10 minutes. Add chicken broth and bring to a simmer. Remove pan from heat and puree peas, squash, onion with a handheld immersion blender, or in a stand blender (take care when pureeing hot liquids in a blender; remove the center venting piece from the blender, but hold a dishcloth over the opening to avoid having the hot liquid spray everywhere, making a huge mess and potentially burning you and anyone in the vicinity). The soup can be as chunky or as smooth as you like. I left some very small pieces of vegetable in mine to give it a little heft.

Return the pureed soup to the heat and add the reserved chicken. Bring the liquid to a bare simmer and let cook until the chicken is cooked through, about 5 more minutes.

Add ½ cup cream, ½ cup grated parmesan, and 1 tablespoon chopped tarragon. Stir to distribute through the liquid. Add salt and freshly ground pepper to taste.

To serve, ladle soup into bowls, and scatter with reserved pancetta, chopped, and a scattering of grated parmesan.

Monday, July 28, 2008

Frothing: I never really liked these people that much anyway...

and now I really don't like them. The America's Test Kitchen/Cook's Illustrated/Cook's Country folks are getting a leetle too big for their britches, in my estimation. You can read the whole story here on Melissa's site.

The gist of the situation is that the PR rep for this group emailed a blogger who posted a version of a Cook's Kitchen potato salad she'd made. She changed several ingredients (four, actually) but credited Cook's Kitchen as the original source or inspiration. The PR woman (again, my opinion, although I am far from alone) was pretty snippy about the whole thing. We don't allow our recipes to be modified. They are tested up to a hundred times and they work. I read, "Your modifications to our recipes can't possibly improve them; they are the pinnacle of recipe perfection." Well, sorry, but they're not.

Melissa herself makes this point: they don't allow it. I would assert that once you publish a recipe, you're putting it out there for all to take a whack at. Granted, they can't republish your instructions word for word, but they sure can make your recipe and say, "Not bad, but you know, it needed more cumin. And maybe some ground coriander. And I bet if I added a little Old Bay seasoning it would make it interesting..." and they're off.

Recipes are a creative process. Part of the joy in food blogging is seeing what other people have done with a recipe. I myself had my eyes opened by food blogs in which people read magazines--magazines that I myself receive--and saw things I never saw in them. People taking what had been side dishes, or accompaniments, or even garnishes, and turning them into something amazing. And they credit those sources by saying "adapted from" or "based on the recipe in" and I myself see nothing wrong with this. Good lord, if it weren't for this kind of tinkering, we'd all still be cooking from Apicius or Escoffier. Or burning up slabs of dead buffalo in campfires.

Food is subjective. What tastes good to me may not taste good to you. The same goes for music, books, art, you name it. Melissa also publishes an excerpt from a Washington Post article from 2003 quoting Christopher Kimball (surely one of the ten silliest asses in America today, at least as he's characterized in this article) saying that changing one of their (ATC's that is) recipes is like saying you're going to play a Bach sonata but change the key. Surprise, Mr. Kimball, people do things like that all the time. Wander through a museum and watch a painter reproducing a great work on his or her own canvas. Read a book that's a pastiche of another work. Hell, watch The Lion King and ask yourself: who did it better? Shakespeare or Disney? You'll notice that The Lion King bears a striking resemblance to Hamlet (dead father, innocent son, evil uncle; they did miss out on the relationship between Hamlet's mother and his uncle--hey, this is a family movie, people).

And so, like so many other bloggers I say, back off, America's Test Kitchens. You didn't invent food. You didn't invent cooking. And in many cases, you didn't even take it to the heights of perfection that you so clearly think you did. I've made several recipes from your cookbook (the one that I own and now wish I could return; too late, I wrote in it a few years back...making notes on how to IMPROVE THE RECIPE, I might add!!) and then made other versions that I thought were better.

America's Test Kitchens is not God's gift to the culinary world. They need to stop acting as though they are.

And as my own small contribution to the nose-thumbing in the direction of ATC that's taking place all over the food blogging community, here's a link to my Chocolate Chip Scone recipe in which I reproduce the directions for the process word for word. If they demand that I do so, I will reword the instructions, but otherwise it stands as it is. Take that, ATC!

Tuesday, July 22, 2008

ARF/5-a-Day Round Up on Sweetnicks

The Modern Apron has the privilege of being part of the last ARF/5-a-Day Round Up that Sweeetnicks will be doing. Go over and say a fond farewell to a very noble effort--getting us all to eat more foods that are both yummy and good for us. Thanks for everything, Cate!

Phases: Roasted Fingerling and Tomato Salad with Green Beans and Arugula

It’s probably no secret by now that I have lots of kids. Lots of young kids. My oldest is five and starts Kindergarten in the Fall, the youngest is twenty months. In between we have a set of three year old twins. Thus it is that I spend most of my time unwrapping cheese sticks, making peanut butter sandwiches, and putting the valves back into sippy cups (the day my youngest gives up sippy cups we are going to have a huge bonfire and I’m going to throw every sippy cup in the house on it and dance a merry jig while they melt to a molten oozing charred oblivion; they’re a great invention, but for about four years now I’ve felt like I spend my days doing nothing but putting valves back into sippy cups).

However, this is not a rant about the evils of sippy cups, but more a discussion of the challenges of cooking with so many children so young. It’s very hard to get a large block of uninterrupted time to do anything. I was eyeing a chocolate cream pie with caramel whipped cream last week, and after reading the recipe through about three times, I realized I was either stupid or crazy (possibly both, of course). Did I really think I was going to have time to make a boiled custard, to say nothing of a chocolate pate sucree? Madness.

So what I need are recipes that can be done in stages, in which the components can be prepped, then left to sit before anything is done with them. Or they can sit around for a little while after something is done with them, and they won’t deteriorate. I found just such a recipe this weekend, and it’s elegant and yummy too.

The June issue of Martha Stewart Living had an article on potato salads with oomph. These were more than just your basic potatoes + mayonnaise + aromatics. These were actual meals. I had noticed a bag of Russian banana fingerlings in my grocery store two weeks ago, and when this salad, which uses them, caught my eye, it seemed like fate. Fate brings me to a lot of recipes (such as this one, and this one). Usually they’ve been pretty good in the past, so I trust this Fate fellow these days.

I was not disappointed this time either. The potatoes and tomatoes are roasted with some olive oil, garlic and thyme, and then tossed with arugula and blanched green beans in a red wine-Dijon vinaigrette. I cut the potatoes and tossed them and the tomatoes with the garlic and olive oil puree, scattered them with thyme (I didn’t even have to pull it off the stem! Talk about easy!) and popped them in the oven. This is about the only piece of this recipe that really couldn’t be left to languish; once the potatoes are cut up, they need to head for the oven promptly lest they turn that sad grayish color that potatoes do turn. But since the prep for this step is mostly done with a sharp knife and the blender, it can be completed in the time it takes one three year old to eat a banana and a bowl of animal crackers.

Next I topped and tailed the green beans, which could sit out with no ill effects. I made the dressing. Again, a patient component that will wait until you’re ready. When the potatoes and tomatoes were done roasting, I pulled them out and let them cool their heels on the stove for a little while, during which time I read “Hungry Pig” and explained that, yes indeed, the sun was going down. I think I may have had a glass of wine in there too.

I blanched the green beans, shocked them, and let them drain while I rounded up the last kid from a water balloon fight and saw him headed for a bath. He was allowed to watch George of the Jungle and then off to bed.

Finally, dinner time! I tossed the arugula and green beans with the potatoes and tomatoes (and I confess, I used more like three to four cups of arugula for four people versus the two in the original recipe, and 6 ounces of green beans, rather than the 3 ounces called for), and served the dressing on the side.


I won’t lie and say we ate before 9 p.m. but I will say that this salad held up to a phased preparation incredibly well. Nothing suffered because of the wait, and it all came together into an elegant and delicious meal. I heated up some rosemary ciabatta to go with it, and it was an excellent dinner for a summer evening.


Roasted Fingerling and Tomato Salad with Green Beans and Arugula
from Martha Stewart Living, June 2008
serves 4-6


For the Salad
5 garlic cloves
½ cup extra-virgin olive oil
1 ½ pounds Russian banana fingerling potatoes, halved lengthwise
1 pint cherry tomatoes
4 stems fresh thyme
Salt and freshly ground pepper
6 ounces green beans, trimmed
3-4 cups baby arugula

For the Dressing
2 tablespoons red-wine vinegar
1 tablespoon Dijon mustard
½ teaspoon minced fresh thyme
½ shallot, minced
1/3 cup extra-virgin olive oil

Make the salad: Preheat the oven to 375 degrees F. Puree garlic and olive oil in a blender until smooth. Toss with potatoes, tomatoes, and thyme on a rimmed baking sheet. Season with salt and pepper. Bake until potatoes are golden and tender, 30 to 40 minutes. Let cool slightly. Or quite a bit.

Prepare an ice-water bath. Cook green beans in a large pot of boiling water until bright green and just tender. Transfer to ice-water bath. When cool, drain beans in a colander and let them sit as long as necessary. They won’t mind.

Make the dressing: Combine vinegar, mustard, thyme, and shallot in a small bowl. Add oil in a slow, steady stream, whisking until emulsified. Set aside until needed.

When all children are in bed, and you’ve had ten minutes to relax, toss potato mixture, beans and arugula with dressing (or you can do as I did and toss the vegetables together and serve the dressing on the side). Season with salt and pepper. Serve immediately or at room temperature. If there’s going to be a gap of an hour or two between the preparation of all the components, and the actual serving, I recommend keeping everything separate and tossing it all at the last minute. Arugula gets so pathetic looking when it sits too long in dressing.

Monday, July 21, 2008

Relaxed: Best Buttermilk Pancakes

What says lazy and leisurely more than a stack of pancakes? Pancakes are Sunday morning food, vacation food. I remember going on vacations as a kid and eating at the hotel restaurant and ordering pancakes. I never got pancakes at home, so I took every opportunity to order them when I could. Even fast food pancakes are a food for a slow day. You can’t eat them in the car, so you have to have the time to go in and sit down. I don’t know of anyone who doesn’t like pancakes in some form or other.

My kids are being indoctrinated into this mindset as well. On Sunday mornings they always beg Daddy to make pancakes. Usually by the time they’re made all the kids have had something else: a peanut butter sandwich, a bagel with cream cheese, a bowl of dry cereal (or possibly all three). But the sentiment is there.

Pancakes work for any season. True, in the hottest depths of summer, if you have no air conditioning (very common in the Pacific Northwest: we have only about two or three weeks of “air conditioner” weather per year; and I always say that you don’t need air conditioning often, but when you need it you need it) standing over a hot stove or griddle flipping pancakes may not be your favorite thing to do. But for the most part, pancakes aren’t season-specific as other things can be.

And pancakes are pretty hard to screw up. Short of not getting them to flip properly (a situation easily remedied if you make them a little smaller so the pancake turner fits under them easily), a good recipe will result in good pancakes. We’ve used several recipes over the years, all of them producing a pretty good product. In our young, carefree, childless days we ate a whole grain pancake recipe from Cooking Light. The scrap of paper lived on our fridge for years and was called into service every Sunday morning.

Then we moved, and the recipe got packed somehow, and we were thrown back to random other recipes from various sources. For awhile we used one from Marie Claire that used self-rising flour and few other ingredients, making it a great kid recipe. Then one morning I stumbled on a recipe that I think is the one I’ll be using from now on. I found it in The Martha Stewart Living Cookbook: The Original Classics. I’m not sure what led me to this recipe, but I’m certainly glad to have found it.

It’s got enough interesting ingredients (eggs, buttermilk, melted butter, vanilla) for my kids who now want to feel like they’re doing more when they “help” us cook, and it makes a light spongy pancake that soaks up the maple syrup but doesn’t fall apart. This is key. So often there’s not enough body to a pancake for it to withstand being drowned in syrup. They just collapse in a heap of soggy mush, impossible to pierce with a fork. You end up kind of shoving it onto the fork with the remains of a half of a slice of bacon, and sticky crumbs dribble back though the tines to the plate. Most disheartening.

If you’re still searching for that perfect pancake recipe, you should try this one. You can make the batter as thin or as thick as you like by adding a little more buttermilk or flour, and using only ¼ cup of batter per pancake means that if you have a reasonable sized pancake turner, you can flip it easily, without that horrible smeary mess that sometimes happens when they’re too big. The vanilla isn’t in the original recipe, but I love the little whiff of flavor that vanilla gives to pancakes, so I add a little.


Best Buttermilk Pancakes
from The Martha Stewart Cookbook: The Original Classics
The recipe claims this makes nine 6-inch pancakes, but we’ve always gotten way more than that out of it; it alll depends on how big you make the pancakes.

2 cups all purpose flour
2 teaspoons baking powder
1 teaspoon baking soda
½ teaspoon kosher salt
3 tablespoons sugar
2 large eggs, lightly beaten
2 teaspoons vanilla
3 cups buttermilk
4 tablespoons butter, melted
Butter for pan or griddle (if desired)

Preheat an electric griddle to 375, or place a skillet over medium-high heat. Whisk together the flour, baking powder, baking soda, salt and sugar in a medium bowl. Add the eggs, buttermilk, and melted butter, and whisk to combine. The batter should have small to medium lumps.

Preheat the oven to 175 degrees. Check the pan or griddle by flicking a few drops of water on it. They should bounce and spatter right away. Brush on ½ teaspoon of butter, if desired, and wipe off excess with a paper towel.

I use a ¼ cup measuring cup to scoop some batter into the pan. If you have room for multiple pancakes in your pan (I don’t) you can pour out pools about 2” apart. When pancakes have bubbles around the sides and in the middle, and are slightly dry around the edges, flip over (this will take about 2 and a half minutes). Cook until golden on the bottom, about another minute.

Repeat with remaining batter. Keep cooked pancakes on a heat-proof plate in the oven. Serve warm.

Tuesday, July 15, 2008

The Modern Apron on Sweetnicks

The berried muffins from a couple of week ago are featured in the ARF/5-a-Day Roundup on Sweetnicks. Hop on over and check out the other great offerings--always something good there!

Wednesday, July 09, 2008

Foods I Hate

Tell me blue Go Gurt comes out of pajamas. And the answer to the obvious question is: I didn't give it to her. The little angel next to her gave it to her. Guess I can't fault him for sharing.

No more Go Gurt in my house, ever!

P.S. You'll notice it's Wednesday and I'm still alive. Guess the strawberry jam is OK to eat (well, that one jar, anyway).

Monday, July 07, 2008

Trepidation: Strawberry Jam

Approximately four thousand years ago, I bought a home canning kit. It consisted of a proper round rack for holding the jars in a large stock pot, a set of scientifically engineered tongs for raising and lowering the jars safely into (or out of) the boiling water, a little plastic wand with a magnet in the end of it, for grabbing the metal lids and rings out of the water when sterilizing them, and I forget what else (probably at least a thermometer). With the exception of the rack, they were all a cheerful shade of aqua blue plastic that made me think of the color of a swimming pool under the summer skies. All of these items sat in pristine condition in my various kitchens, totally unused because I have a terror of explosions, botulism, and other shadowy horrors that I’m convinced surround the canning process.

Time passed, and I read over and over that canning wasn’t scary. Really, it wasn’t. Fannie Farmer reassured me. Magazine articles did their best to convince me. Cookbooks whispered comforting words of encouragement. Finally, when the strawberries in my local grocery store were being delivered on a daily basis by farms less than two hours away, I decided I was a big ol’ wimp and better give it a try. I brought home two flats of strawberries, and dove head first into strawberry jam. I read two magazine articles, two cookbooks, and recipe pamphlet circa 1959 from a box of commercial pectin. It’s also worth noting that the strawberries I had were approximately a quadruple batch of jam. Never let it be said that I do things by halves, even on the first go ‘round.

I am not going to pretend that canning isn’t a colossal pain in the ass. It is. People who write the instructions for jam making toss off a breezy, “sterilize x number of jars, lids, and rings.” All very well, but unless you have a really big stock pot, all of those jars are not going to fit in the pot at one time, and you will have to do the sterilizing, dishing up, and processing in batches. Also, they casually mention that you must put the jars on a rack in the boiling water; they can’t just sit on the bottom of the pot. Since that perfect rack I bought with my canning kit so many thousands of years ago has long since disappeared, I don’t have a rack that fits in any of my pots. All my racks are oval or rectangular roasting racks, or rectangular or square cooling racks. Hm.

So I turned to my assortment of kitchen tools and found some egg rings that make a reasonable platform for the jars. You could also use cookie cutters of various shapes jigsawed together (secured with paper clips) to form a circle-like shape. Or use the rings that go on the jars.

I’ve also read that when jam is ready it looks like jam. It forms a mass and just looks, well, jammy. I have also read that strawberry jam thickens as it cools. I certainly hope so, I thought, because otherwise I have the largest batch of strawberry syrup in the history of the world. I’d better break out the ice cream maker, just in case.

And jam making is apparently not for the clumsy. Remove the full jars from the processing bath without tipping them, I was cautioned. Without tipping them? Pardon my French, but shit, I was lucky to get them out without dropping them. And I didn’t always manage that. I dropped four of them and they wound up on their heads in the boiling water.

The easy part is the jam itself, it would seem (assuming it gels). Hull the strawberries, toss them in a big pot with some sugar and lemon juice, mash with a potato masher, bring to 224 degrees on a candy thermometer (or, if you’re me, on a candle making thermometer; don’t ask) and hey, presto. Jam. Well, in theory.


If the flavor of the syrupy starter is any indication, this is truly in the realm of the Best Jam Ever. Many years ago (and probably the event that propelled me into the Home Canning Kit Ownership age) I had some raspberry jam that a friend’s mother made from raspberries picked in their back field. It was incredible. It was bright and clear and true. You often read those words in descriptions of homemade jam, but there’s a reason. Homemade jam does taste more than store bought. It’s more immediate, more real. I can’t really describe it without sounding clichéd and verging on corny (and using an annoyingly excessive number of italicized words), but you really can’t fathom it until you have it (whether it’s yours or someone else’s).
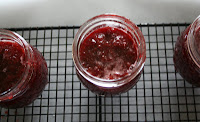


But I’m actually writing this as the process moves along (four batches of jar sterilizing, plus processing, has taken the better part of three hours), and I have to say, I’m a little worried. Even the stuff in the pot isn’t thickening up, and it’s pretty close to cool. I may be left with 16 jars of strawberry syrup, a sticky stock pot, and a kitchen floor right out of a Smucker’s factory.


[14 hours later]

Well, some of it still looks a bit thin, and some of it looks fine. It’s not as thick as commercial jam, but I was warned that unless I used commercial pectin it wasn’t going to be that thick. As for how it tastes, I was right about it being amazingly good. As to whether or not I’m going to contract botulism and keel over, well, I can’t say for 24 to 36 hours, as I understand that’s the incubation period for botulism once ingested (don’t ask why I know this). So I have a ton of strawberry jam that I’m a little leery of eating. I’d call this experiment a success, although I won’t be able to declare it a complete success until I find out if I live to Wednesday. However, I didn’t blow anything up, or set my kitchen on fire during the canning process, so that’s on the plus side of the ledger.


Strawberry Jam
makes about 3 pints of slightly scary (to me) jam
adapted from a whole bunch of sources

6 cups hulled strawberries
3 -4 cups sugar (depending on sweetness of berries)
1 to 4 tablespoons lemon juice (again, depends on how sweet the berries are)

Combine sugar, berries, and lemon juice in a pot over medium-high heat. Crush berries with a fork or potato masher. Cook, stirring almost constantly, until sugar dissolves and strawberries liquefy somewhat.

Turn heat to low and cook 30 minutes, stirring occasionally, until the fruit has broken down and the mixture is thick. Test for gelling by putting a small spoonful of jam on a plate that has been in the freezer for a few minutes. Place plate in the refrigerator for two minutes. Check the jam; if it’s gelled, you can proceed to the canning. If not, cook for a few more minutes and test again.

Wash and sterilize canning jars (see, there I go, tossing that one off; you can use really big ones, or smaller ones, it’s up to you). Ladle jam into jars, screw lids onto jars, and place in a boiling water bath for 10-15 minutes. Remove and allow to cool.

Jam keeps for up to a year.

N.B. Due to circumstances beyond my control, I was forced to leave the strawberries and sugar on a low simmer for three and a half hours, plus the “regular” recommended cooking time. My stove is gas and has a “simmer” setting that keeps whatever it is just barely, well, simmering, for as long as you leave it. Did this have any effect on my jam? I can't say.

UPDATE: I stand corrected on botulism in strawberry jam. Botulism is possible in low-acid foods--carrots, green beans--that are home canned. But higher acid foods like strawberries or tomatoes wouldn't be suceptible. In retrospect, I recall having read this some years ago, but in my gripping fear, I forgot it. Phew, that's a relief!

Saturday, July 05, 2008

Replay: Savory Bread Pudding

I posted about savory bread pudding here, and last night I had a stale loaf of bread that needed using, so I thought I would share what I did with it, since I'm not doing steady blogging here this week.

I chopped up an onion and satueed it with almost a pound of sliced mushrooms. I stirred the onion mixture into the torn bread, added the milk and eggs, and baked. Just before it was done, I pulled it out and scattered about 6 ounces of chopped blue cheese over the top, returned it to the oven and let the cheese melt. The result was outstanding. I have no picture of it, I'm sorry to say, but it was a yummy variation on a theme.

Thursday, July 03, 2008

Short Break

Hi there--I'm in need of a short break. I have my kids (all four of them!) home with me for the next week or so, and it's hard enough to even cook, much less actually photograph and post with little kids around. Thus, a break.

I promise to come back the week of the 14th with a real winner--maybe even multiple winners. If I tried posting prior to that, what you'd get is pictures of chicken nuggets and frozen taquitos.

Happy cooking, and stop back in the week of the 14th!

Wednesday, June 25, 2008

The Modern Apron on Sweetnicks

The Cream Peas with Pancetta that I posted a couple of weeks ago are part of the ARF/5-a-day roundup on Sweetnicks. Go check out what everyone else submitted as well! Yummy stuff that's good for you--can't beat that.

Friday, June 20, 2008

Mini Post: Frustration!

I hate when this happens!

The Scene: My house; I am preparing to go to the grocery store. I have my list in my hand.

Me: Oh, I wanted to make that [recipe recently seen]. I had better make sure I have all the ingredients. I will look at the recipe. It was right here in this book.

[picks up book and flips to index, looking for name of recipe]

Me: [baffled] Why, I know it was right here in this book...or, well, maybe it was this one...I was reading it recently, too...

[checks another book lying on table]

Me: Hm, not here either...oh, well maybe it was in this magazine I was reading the other night...

[flips through magazine without success]

Me: Argh! Where was that recipe?!?!?


Google! Get on this--I need to be able to do a keyword search of my brain!!!

Thursday, June 19, 2008

Elusive: Cherry Cobbler

A few facts:

1. Last week I had quite a lot of cherries from various sources.

2. I decided that a cherry cobbler was just the thing to make with my cherries.

3. I have over 300 cookbooks; I have more than 100 back issues of cooking magazines from two continents; I have thirteen 1 ½” binders with recipes torn from magazines.

4. I looked through perhaps a dozen of those cookbooks and a dozen more other sources for a cherry cobbler recipe

5. There was not a single recipe to be found for cherry cobbler.

Can you believe this? There I stood, bowl of cherries on the counter crying to be made into cobbler, and nowhere could I find a recipe. I kept waiting for someone to jump out and show me where the camera was hidden. It was madness.

I was finally forced to adapt a recipe. I pulled out the ever-faithful Fannie Farmer and looked at the recipe for apple cobbler. Pretty basic: butter, flour, egg, milk, sugar. I decided to add some oats to the mix, for interest and whole-grain-ness, and a little cinnamon for zip.

I would like to say that Fannie Farmer has an interesting shortcoming that I didn’t notice until I adapted this recipe. When they give amounts of ingredients, they don’t indicate if they’re to be in any way divided in the ingredient list; that information is in the body of the recipe. So if you’re kind of a sloppy cook, as I was when I made this cobbler, you’ll do something like dump ¾ of a cup of sugar on the fruit, when really ¼ cup of it was intended for the fruit, and the rest was intended for the topping. Way to go, me.

As it turned out, the fruit mixture was not so sweet that it made your teeth ache. They throbbed for perhaps a second, but in the end they were fine and there was a nice lot of syrup with the fruit. I think you could fiddle with the amount of sugar until you got it down to a reasonable level of sweetness, say between ¼ and ½ cup. You might not get quite as much syrupy goodness, but you’re not flirting quite as blatantly with diabetes, either.

The topping this makes is much more cakey than crumbly. In fact, I’d go so far as to say it’s not crumbly at all, because it’s made with melted butter instead of cold. If you’re a crumbly-topping-on-cobbler purist, you’re going to be let down. However, it does have a nice upside-down cake quality about it that’s endearing if you’re open to a variation on a theme.

I used a large round ceramic casserole I have that holds about 3 quarts in which to cook this. Really any baking pan will do, so long as it holds the fruit and isn’t too spread out. I tried using a couple of rectangular ones, and quickly realized that the fruit was practically in a single layer, and that the topping wasn’t going to stretch out quite that far.

So here’s my recipe for Cherry Cobbler, because apparently they’re scarce. When you check Martha, Alice, Shelia and Julee, Sara Foster, Mark Bittman (Mark Bittman!), Fannie, and a whole bunch of magazines, and no one has a recipe for Cherry Cobbler, you know there’s a gap, and you need to fill it. Serve this warm with vanilla ice cream.


Cherry Cobbler
adapted from The Fannie Farmer Cookbook
makes 6-8 servings, depending on how much ice cream you serve along with it

4-5 cups cherries, pitted
1 ½ cups sugar, divided
8 ounce (1 stick) butter, melted
½ teaspoon salt
½ cup milk
1 egg
2 teaspoons vanilla extract
1 ½ cups flour
1 ½ cups old fashioned rolled oats (not instant)
1 teaspoon baking powder
2 teaspoons ground cinnamon

Preheat oven to 375 degrees F.

In a large casserole, place cherries so they’re about 3-4 cherries deep (you don’t want them so spread out that they’re in a single layer). Sprinkle with ¾ cup of sugar.

Combine melted butter, milk, vanilla, and egg. Stir in ¾ cup of sugar. Add salt, flour, oats, baking powder, and cinnamon and stir to combine.

Drop topping over cherries in large spoonfuls. The topping should cover the cherries comfortably, but don’t worry if a cherry peeps through here and there.

Bake for 35 to 45 minutes or until cherry filling is bubbling around the edges of the topping. Remove from oven and allow to cool 10 to 15 minutes. Serve with vanilla ice cream or whipped cream.

Sunday, June 15, 2008

Happy Father's Day!: Biscuits

This won't be lengthy, as I have children to look after, but I thought I'd share this quickly.

This morning Alex decided to make biscuits. He used a recipe from Joy of Cooking.

Here's what he produced.


Yep, he's a keeper.

Biscuits
from Joy of Cooking

1 ¾ cups sifted all-purpose flour
½ teaspoon salt
3 teaspoons baking powder
1 teaspoon sugar
4-6 tablespoons butter
¾ cup milk


Sift together flour, salt, sugar, and baking powder in a large bowl. Add butter and cut into dry ingredients until the mixture is the consistency of coarse corn meal. Make a well in the middle of the dry ingredients and add the milk. Stir until the dough is fairly free of the sides of the bowl. Turn out onto a lightly floured board and knead gently and quickly, making about 8 to 10 folds. Roll out to a thickness of about 1”. Cut out with a biscuit cutter lightly dipped in flour. Place on an ungreased baking sheet and bake until lightly browned, 12-15 minutes. Makes about 24 biscuits for appreciative small children and spouse.

Tuesday, June 10, 2008

Vanquished: Brioche

Sometimes I think I might be crazy. Other times I think maybe I’m just not too smart. For years I have harbored a ridiculous fear of brioche. I don’t mean I cower if I happen to meet one on the street, but I’ve been timid about the idea of making it. I’m not really sure why, since I’ve taken on other breads fearlessly and been successful with them. Maybe it's that name: brioche. It just sounds so fancy. Or maybe it’s that funny pan it’s supposed to be cooked in. I have one, but I’ve never used it. That round fluted shape makes me think of a crown. Perhaps I’m intimidated by brioche’s lineage.

This weekend we were having family over to celebrate the twins’ third birthday (which is actually today). It was brunch, so I wanted something that could wear both hats, if you know what I mean. We were having a salad luncheon: chicken salad, fruit salad, green salad, baked eggs (which, OK, aren’t a salad), and cupcakes for dessert. I wanted a bread that would be breakfasty but lunchy at the same time. Sweet bread wouldn’t work with the chicken salad, and something like baguette or rosemary bread would leave the fruit salad and eggs as the only breakfast components.

In flipping through one of my favorite cookbooks, The Crabtree & Evelyn Cookbook (now sadly out of print, but which is probably responsible in part for the start of my food obsession) I came across three recipes in the index that all had possibilities. One was a Sally Lunn bread, one was Whole Wheat and Potato Cloverleaf Rolls, and the last was Brioche.

The description of the Brioche was so comforting. It says that this recipe is “An ideal introduction to brioche making…” because it doesn’t use the fluted pan. It uses a simple rectangular bread pan. The words fairly stroke your hand and murmur, “There, there, you can do this.” And so I did.

Aside from not using the proper brioche pan, this recipe also lets you whip everything up in a food processor. The dough actually comes out looking more like batter, which rather worried me, and as in other instances where I’ve used rapid-rise yeast, it looked the same after I let it rise for an hour as it did when I scraped it out of the food processor into the bowl. I was a bit apprehensive, but I’d come too far now to back down. Into the oven it went, while I crossed my fingers, swallowed a green m&m whole, threw salt over my right shoulder, rubbed my rabbit’s foot, and tried to remember where I’d put that four leaf clover.

Forty minutes later, what a roaring success. Although it comes out of the oven looking crusty, nothing could be further from the truth. It’s light and airy, faintly yellow from all those egg yolks, and soft as a peony blossom. I sliced it into pieces and laid them out on a platter and was agog at how easy it was. Magnificent.


I served it with butter and jam for those wanting to emphasize its more breakfastlike traits. It also went beautifully with the chicken salad, its buttery goodness a nice foil for the creamy salad.

They say the best way to conquer your fears is to face them. Now, where is that brioche pan?

Yes, this is my daughter helping me and yes, she is wearing her winter coat over her pajamas; no, I don't know why.
Brioche
from the Crabtree & Evelyn Cookbook
makes one really friendly loaf


2 ½ to 3 cups all-purpose flour
1 ¼ -ounce package quick-rising yeast
1 tablespoon sugar
1 teaspoon salt
½ cup (1 stick) unsalted butter
4 large eggs

Preheat oven to 375 degrees F.

In a food processor fitted with a steel blade, add 2 cups of flour, yeast, sugar, and salt and pulse to mix. In a small saucepan, heat butter with ¼ cup water until butter is melted and mixture is hot to the touch (125 to 130 degrees F). Pour the liquid into the dry ingredients, and process a few seconds, or until the dough begins to form a ball. Add eggs and process for about 45 seconds, or until dough becomes smooth and sticky and begins to pull away from the sides of the work bowl. If dough is too wet, add some of the remaining ½ cup flour and process for a few seconds more. (N.B. in my experience the dough never pulled away from the sides of the work bowl, and I added about another ¼ cup of the flour; at that point I said, “The hell with it” and set it to rise.) Scrape dough into a buttered mixing bowl, cover with a damp cloth and let rise in a warm place for 45 minutes to 1 hour, or until doubled in bulk. (Ha!)

Punch down dough, and place in a buttered 8 ½ inch x 4 ½ inch loaf pan. Cover with a damp cloth and let rise until doubled in bulk again, about 30 minutes. (You know what? I just realized I didn’t do this; seems this step is optional, folks!)

Place brioche in the center of the oven and bake for 35 to 45 minutes, or until the top is deep golden brown and the loaf sounds hollow when tapped lightly on the bottom. Turn out onto a wire rack and cool completely before slicing.

Monday, June 09, 2008

Mini Post: Lunchtime

Here's something I just don't understand. I'm sitting at my desk, eating my lunch, and someone comes to my door to ask a question. Now, since I am sitting at my desk, I'll concede that I'm fair game for a question, and a quick one is no problem. Since my company has no lunch room, there's no place for me to eat other than my office if I bring my own lunch (which I often do).

But what I don't understand is the person who says, "I can see you're eating but..." and then proceeds to launch into an involved discussion about something work-related (and worse, it's usually something work-related about which I care diddly squat, which accounts for most things work-related). If you can see I'm eating, then why don't you buzz off and let me eat? I have my fork poised above my (rapidly cooling) food, can you not divine that I am most anxious to continue with my meal? And if you failed to notice my fork, do my obviously disinterested nods and falsely bright smile as I say, "Oh really? No kidding," not clue you in that what I'd really like is for you to piss off and let me eat?

I think the worst thing about this situation is that the people who do this are usually repeat offenders. A single instance is forgivable. Multiple instances should be punished by the offender being stoned to death with Triscuits.

Thank you. I just had to get that off my chest.

Friday, June 06, 2008

Celebrate: Dijon Mustard

There are a few ingredients that are so magnificent that I think we should have national holidays commemorating them. Like the Fourth of July, when we celebrate our nation, certain ingredients deserve to be feted. And we should all get a day off on which to do it.

There actually is a National Mustard Day (the first Saturday in August), but I propose that we pick a day to be National Dijon Mustard Day. It deserves to be recognized by itself, not lumped in with all the other, less spectacular (although still good) mustards. Oh how I adore Dijon mustard. But not just any Dijon mustard; it has to be Grey Poupon. I’ve tried other Dijon mustards and they come up short. Grey Poupon has just the right balance of spice, garlic, and vinegar.

Of course Dijon mustard is excellent on sandwiches, but it’s also a fabulous ingredient. I use it in homemade mayonnaise. It lends a slight tang that I would be hard put to achieve on my own. If I added garlic to the egg, lemon juice, oil, etc to give it that piquancy, it would be overpowering;. In Dijon that flavor is already incorporated into the mustard, so it’s tempered.

I don’t think I’ve ever even made a vinaigrette dressing that didn’t use Dijon mustard. My mother taught me to make vinaigrette, and she always used it. She didn’t measure, she just plopped some mustard in the bowl, added a couple of dashes of white wine vinegar, some salt and pepper, and then whisked in olive oil until it was the right consistency. The first time I read about true vinaigrette, I remember thinking, “This must be a typo—there’s no Dijon mustard in it!”

I also can’t get over the combination of mushrooms, cream, thyme and Dijon. This sauce is my idea of ambrosia. I think if I make one more mushroom-mustard cream sauce with thyme to go with steak on Saturday nights, I may find myself in divorce court. Not that Alex doesn’t like it, but apparently he doesn’t share my insatiable craving for it.

I read about some mushroom custards in a book I have (Slim Forever the French Way or something like that; it had recipes that looked good, so I bought it, sucker that I am). The original recipe looked pretty good, but it was just mushrooms, cream and eggs. I felt like that would produce a somewhat bland result, and that it would need some pep. Since it was cream and mushrooms, my natural inclination was to pop in some Dijon mustard.


These custards are silky and creamy, kind of like the world’s nicest, most sophisticated baby food. That’s not necessarily everyone’s cup of tea, if you will, but they just slip down with the slightest chew on the mushrooms—earthy yet soothing. They would make a good side dish in place of a starch with a steak. You’d have to skip the mushroom-mustard cream sauce, of course, but you’d get it in another form. Shhh, maybe that’s what I’ll do to Alex this weekend in place of the mushroom-mustard cream sauce.

While these are nobody’s idea of healthy (except maybe the guy who wrote Slim Forever the French Way), they would be a lovely thing to serve to guests on a special occasion. They can be made with any variety of mushroom, although of course the more flavorful the mushroom, the better the custards will be. With a salad, they can even be a meal in themselves, suitable for vegetarians.

Mushroom Custards
adapted from Slim Forever the French Way by Michel Montignac
makes 6 servings


1 lb mushrooms, cleaned and sliced
1 medium onion, chopped
2 teaspoons olive oil, butter or a combination of both
1 tablespoon fresh thyme leaves
3 large eggs
½ cup heavy cream
1 tablespoon Dijon mustard
Salt and pepper to taste

Preheat oven to 425.

Heat butter (if using) and/or olive oil in a medium skillet until butter melts and/or oil is hot. Add mushrooms and onions and sauté until mushrooms have cooked down and are somewhat dry, about 10 minutes. Remove from heat and stir through fresh thyme. Season with salt and pepper to taste.

In a large bowl, combine eggs, mustard and cream. Add mushrooms and stir to combine.

Ladle into 6 – 6 ounce ramekins that have been buttered or sprayed with cooking spray, and place in a large roasting pan. Fill roasting pan with warm water to halfway up the sides of the ramekins. Bake 30-40 minutes or until custards are set. Tops will brown slightly, and centers should be well set. Serve warm.

These actually reheat quite well, even in a microwave.


Friday, May 30, 2008

Perplexed: Cream Peas with Pancetta


I found myself in an interestingly conflicted situation today. I, a life long, devout, card-carrying pea hater, found myself standing in front of the cart at my grocery store that held local fresh English peas in the pod, dropping handfuls of them into a brown paper sack. No doubt you ask yourself what I asked myself: "Why is a pea hater buying peas? Isn't that kind of...stupid?" It wasn’t unlike my experience with the Braised Carrots with Crisp Capers. At some point in the recent past an idea had been planted in my brain and (no pun intended) the sprout had now emerged and here I was, stuffing peas in a sack like an amateur jewel thief.

I can even pinpoint the event that triggered this: last week my friendly local produce lady Shannon (the one who gives me beautiful specimens of newly arrived heirloom tomatoes, and other treats) offered me a few peas fresh out of the shell. She remarked that one customer had told her they were amazing when sautéed with pancetta and served over pasta. That was the start.

This week when I went back, Shannon wasn’t there, but the peas were. And something about them took hold of me; their little voices whispering, “Pancetta, pancetta, pancetta.” It was just too much. I know now how Odysseus felt when trying to escape the lure of the Siren’s song. I had no crew to lash me to my mast, however. I brought them home and decided that they were lunch.


Shelling peas is a very cathartic, soothing kind of chore. After all, it’s the activity of Aunt Bea-like characters in rocking chairs on front porches, bowl on lap, calling greetings to the strolling neighbors as they wend their way down Maple Avenue. It smacks of small town middle America at the height of summer. As you’re doing it, you keep expecting to hear screen doors slam, and the tinkling of the bells as the Good Humor truck rolls up.

It’s an exercise that’s repetitive, but not mind-numbingly so. There’s enough variation in the way each pea pod opens, in the actual contents, in the ease with which the peas pop from their tether inside the pod to make it even mildly diverting in a micro kind of way. I’m not saying I’d want to make a career of it, but for fifteen minutes or half an hour now and again, it’s a nice break from the buzz.

Once I had my little pile of peas (somewhere between ¾ and one cup), I set to work with pancetta and cream. I crisped up the pancetta in a little butter (some lily gilding now and then never hurts anyone), and sautéed the peas until they were just starting to color. Then I poured a third of a cup of heavy cream over them and let it cook down, down, down into a thick ivory colored sauce.

I scattered the crisp pancetta over the top, and consumed the whole bowl in half the time it had taken me to shell the peas in the first place. Perhaps that’s the way to measure how many peas you need: for a serving for one person, shell peas for 15 minutes; for two people, shell for half an hour. Be sure you have all the accessories: bowl for the peas, paper sack for the empty pods, one rocking chair, one wide front porch, strolling neighbors, banging screen doors. If it’s not possible for you to acquire all of those things, then maybe just the bowl and sack, and a willingness to imagine, will do. As I’ve proven, you don’t even have to like peas very much. But when you finish, you'll be hooked.


Cream Peas with Pancetta
serves one and only one

¾ - 1 cup of shelled peas (from ¾ of a pound of peas in the pod)
1 teaspoon butter
3 slices pancetta
1/3 cup heavy cream

Melt butter in a skillet over medium heat. Add pancetta and cook until crisp and fat is rendered. Remove pancetta from the pan and reserve. Add shelled peas and sauté until the peas are just starting to color, about 8 minutes. Add cream, and cook until reduced down by two-thirds, another 5 or so minutes. The cream should be thick enough to coat the back of a spoon. Then give it another minute after that. Season with a timid grind of black pepper; any more than that will overpower the delicate flavors of the peas and sauce. And mercy, don’t add any salt! Pancetta is salty enough. There’s no need to add any at all.

Serve with reserve pancetta crumbled over the top. This recipe could probably be doubled, possibly even quadrupled. You might have to fiddle with the ratio of cream to peas; start out adding a little, maybe a cup or so, then add more if you need it. Otherwise the peas might turn to mush before you could reduce the cream sufficiently. You want the peas to still have a little crunch to them; better to sacrifice a little sauce than have mushy peas.

Wednesday, May 21, 2008

Frantic: Berried Muffins

I work with a woman who can’t spell, and isn’t much for proofreading, either. She pretty much accepts whatever option Spellcheck offers her first, resulting in some rather amusing sentence constructions. And Spellcheck doesn’t catch homonyms. Knowing my love of that kind of linguistic lunacy (it’s the dorky English major in me), my coworkers forward me the best examples. Thus it was one day that I got an email forward in which my poor-spelling, non-proofreading coworker profusely thanked another coworker for her help.

“I really appreciate it,” her email ran, “I’m berried.”

OK, well I thought it was funny.

Anyway, because I myself am “berried” today (and this week, and next week, and oh did I mention my daughter is home today with a stomach virus? The fun never stops!) here’s a fast recipe for blueberry muffins that I think has just taken its place in my canon of cookery as my go-to muffin recipe. Tasty, fast to whip up, versatile, and not even all that bad for you, relatively speaking (I did the math, and each muffin has about a teaspoon of butter in it, plus you can use low fat milk, and there’s only one egg).

I use dried blueberries, but you could stir in ¾ of a cup of any chopped dried fruit, or fresh fruit. I would think you could even use things like mini chocolate chips with great success as well, although I haven’t tried this yet.

So without further ado, here’s the recipe.


Berried Muffins
adapated from The Hood Basic Cookbook
makes 12 muffins at top speed

2 cups flour
½ teaspoon salt
2 ½ teaspoons baking powder
1/3 to ½ cup sugar
1 egg
¾ cup milk
¼ cup melted butter
2 teaspoons vanilla extract
¾ cup fruit

Preheat oven to 425.

Combine dry ingredients in a bowl. Combine wet ingredients in a separate bowl. Mix the two together gently. Stir in fruit. Batter will be lumpy; don’t over mix.

Spoon batter into 12 greased muffin cups. Bake 12-20 minutes, or until a tester comes out clean (baking time will be dependent on the size of your muffin cups—mine take about 15 minutes; your mileage may vary).

